
Learn to Weave: 3 Basic Weaving Patterns for Beginners

Learn to Weave: 3 Basic Weaving Patterns for Beginners
If you read my last post then you'll know I'm absolutely OBSESSED with weaving. The history is absolutely amazing and I knew I wanted to be a part of this ancient art. I know I said this before but did you know other cultures have their way of weaving??
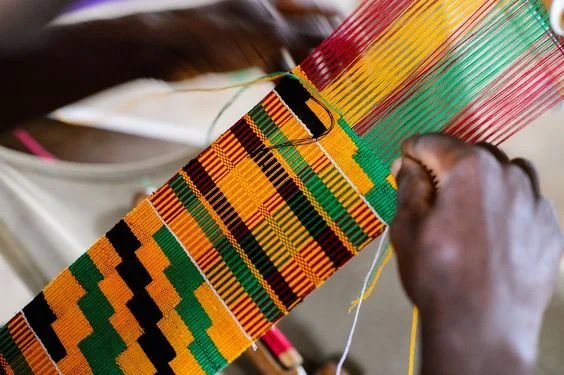
Weaver making gorgeous Kente Cloth in Africa

Women making cloth for handbags in Asia
This ancient art was done for so long and was their primary source of textiles!! Go ahead and google it if you're interested but I won't go into depth about this amazing history in this blog post :) . Let's get to weaving!
Ok, ok, I know I said let's start BUT I do have a question for you: Have you signed up for my email list? Get DIY goodness in your inbox and be the first to know when a post goes live! Sign up by clicking here!
Ok, now let's get started. For real this time :)
Materials You'll need for this Project:
Crochet Thread (I used white but you can use whatever color you like!)
Yarn (again, the colors are up to you)
Roving (if you choose to make the pile weave pattern)
Shed Stick (wooden dowel would do fine)
Ruler or 1-inch thick cardboard the same size as the loom
Needle for the yarn
Plastic Fork
Long Stick or thin, long paint brush
Scissors
Branch or wooden dowel for hanging
Difficulty: Easy
Additional Tools You'll need:Weaving Loom
I'm going to be breaking this project down into 3 techniques. There are SO many more techniques you can do but I feel if you get these techniques down, you'll be able to create so many different types of wall hangings!
Before we get into the techniques, we have to prep our loom.

I tied thread to the top left nail of the loom and looped the thread across two nails (remember I said I like the look of the loose weave? I did this to achieve that look!). Notice that I’m skipping a nail in between the loops. This is done to make sure the thread is straight and not on a weird angle.

You want to make sure the thread is nice and tight since it’s basically holding the wall hanging together. Tie off the end and grab your stick.. aka shed stick

I actually used a dowel here and it broke off on an angle which turned out to be perfect.. I took that shed stick and went over, and under each thread like you see here.

I went ahead and prepped my yarn.. here you’re seeing me wrap the yarn around .. I did this about a hundred times and bam you have long strands for the fringe later on.

I added a ruler for the base of the weaving loom and strung the yarn through the needle.
Alright now moving onto the weaving techniques!

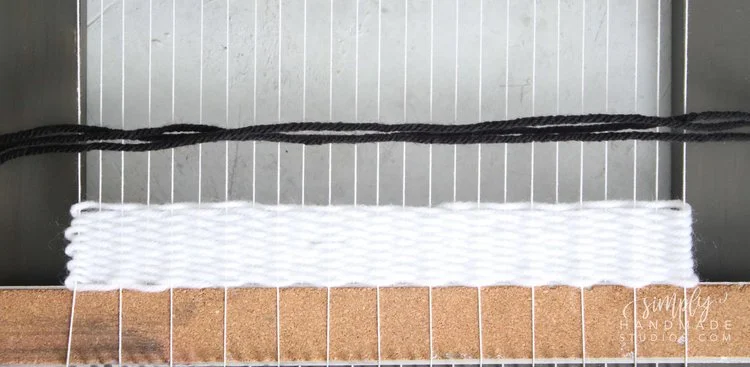
WEAVING PATTERNS: TABBY WEAVE

I took the end of the yarn and put it through the thread toward the bottom of the loom. I went back to the top and began the weaving process. Similar to the shed stick, you’ll want to go over every other thread.

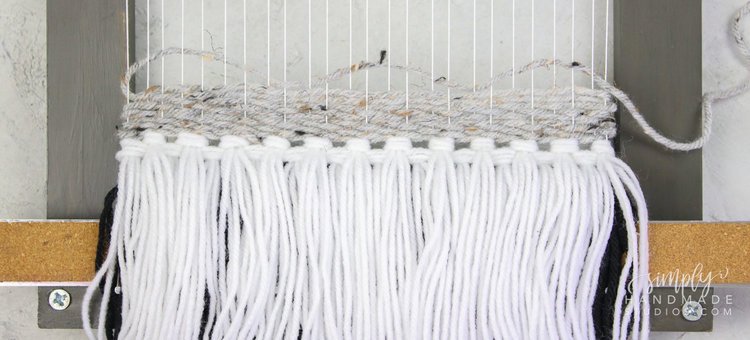

Once you get to the end, you’ll want to form an arch and use a fork to divide it in three then press the rest of the yarn down. The first few lines will be really loose but don’t worry about it.. doing this arch technique will help you not to pull the yarn too tight.

Move onto the next row by going over and under on the opposite strands of the row underneath. This is where the shed stick comes into play. It pretty much divides the thread for you so you can just go right through.

Keep weaving until you have about 12 rows. This section is called a heading and serves as an anchor point for the rest of the weave (images above isn't necessarily the beginning but it serves the same purpose).
To end the tabby weave, just string the yarn through the back of the loom. If you happen to run out of yarn, end the weave and pick up right where you left off.
Once you've got the tabby weave down, let's move onto next technique.
WEAVING PATTERNS: RAYA KNOTS


Next up Is the raya knot. This is ridiculously easy to do. I grabbed 3 strands of the yarn I prepped earlier and found the center. I laid it above two strands of thread and fed the strands underneath on either side
Pull the yarn out, slide it toward the top and back down to tighten.

At the very end you’ll most likely have an uneven amount of thread.. that’s okay just add a knot on the last two then again in between each raya knot. You won’t notice this gap once you start weaving again. I added two rows of white raya knots then moved onto tabby weaving again.
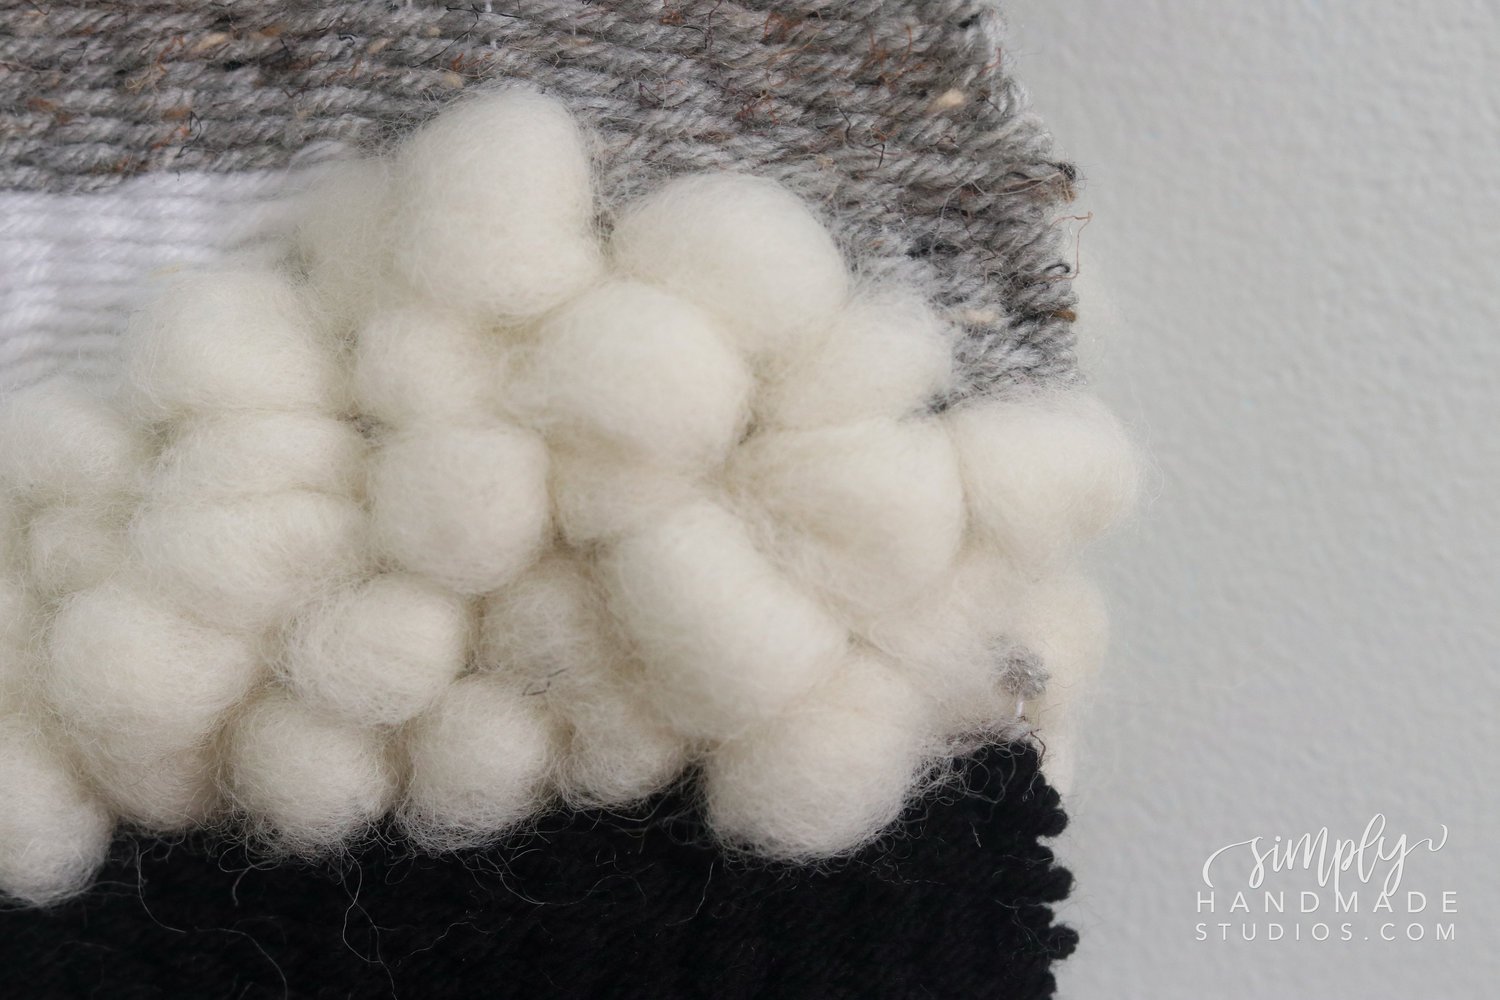
WEAVING PATTERNS: PILE
Once I was done with the tabby weave, I moved onto the cloud like weave called piles.
These cloud like texture is made with a special material called roving. It doesn’t tear apart under a lot of strain but will when there’s a bit of separation.


I got this pack and I have length slightly longer than the loom and separated the roving in half.

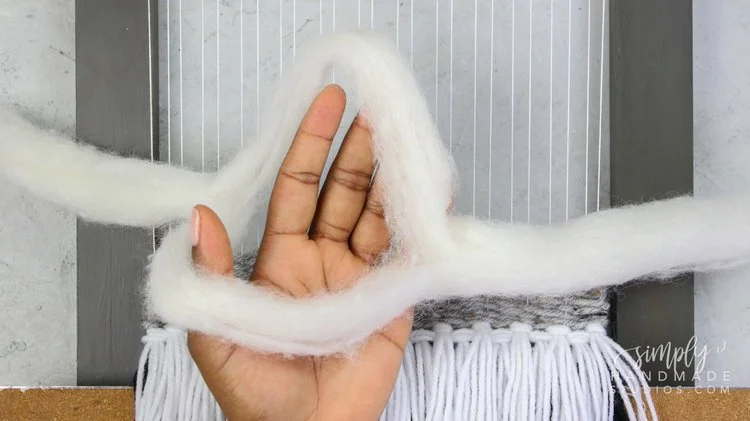
I weaved a little and pulled the roving through the bottom then began the first row the same way I did with the tabby weave.
Once I strung the roving through the rows, I grabbed a long paint brush and started twirling the roving along itself. Notice how I have a loop of extra roving on the side to allow for the pull of the loops.
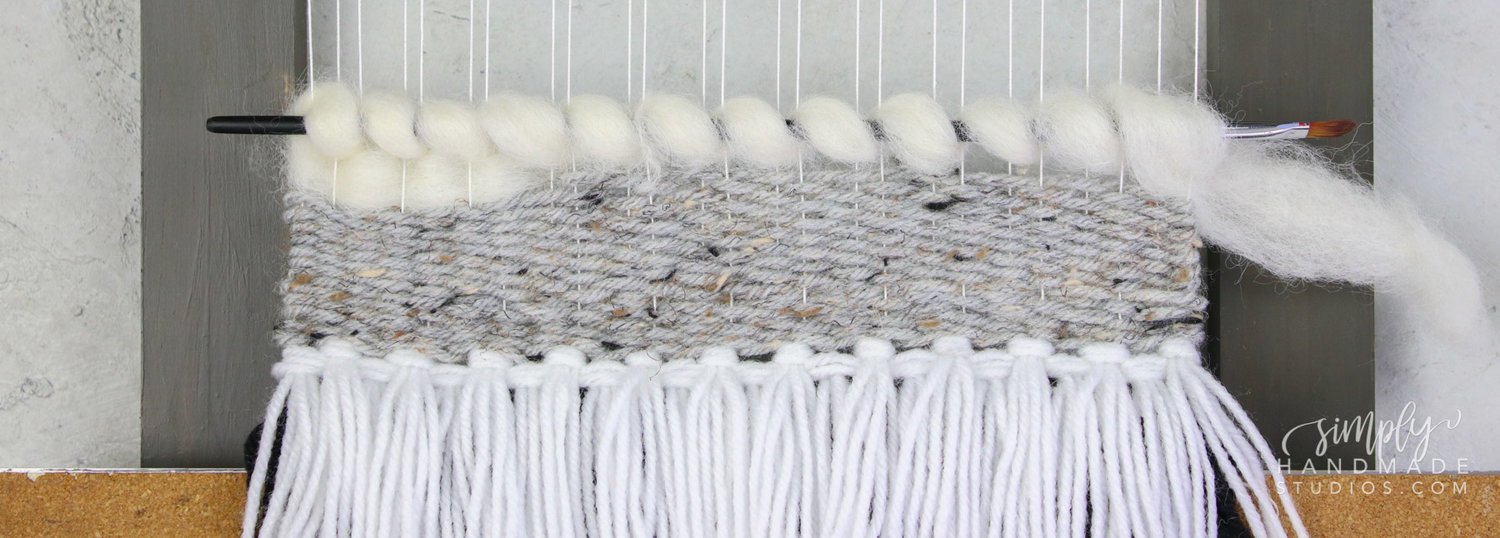
I added some raya knots, and tabby weave in gray and black then moved onto some more piles.
I decided to do a little pattern so I did 2 rows of piles then a third but stopped midway through and added a tabby weave at the top. Just like the tabby, to stop the roving just pull the material through toward the bottom of the loom.
After I made a pile pattern I was happy with, I filled in the gaps with tabby weave. This isn’t hard to do just weave in the empty areas.
Confused? Check out the video below!
FINISHING UP THE WALL HANGING
Continue making whatever pattern you like then stop weaving when you’re about 2 inches from the top of the loom.
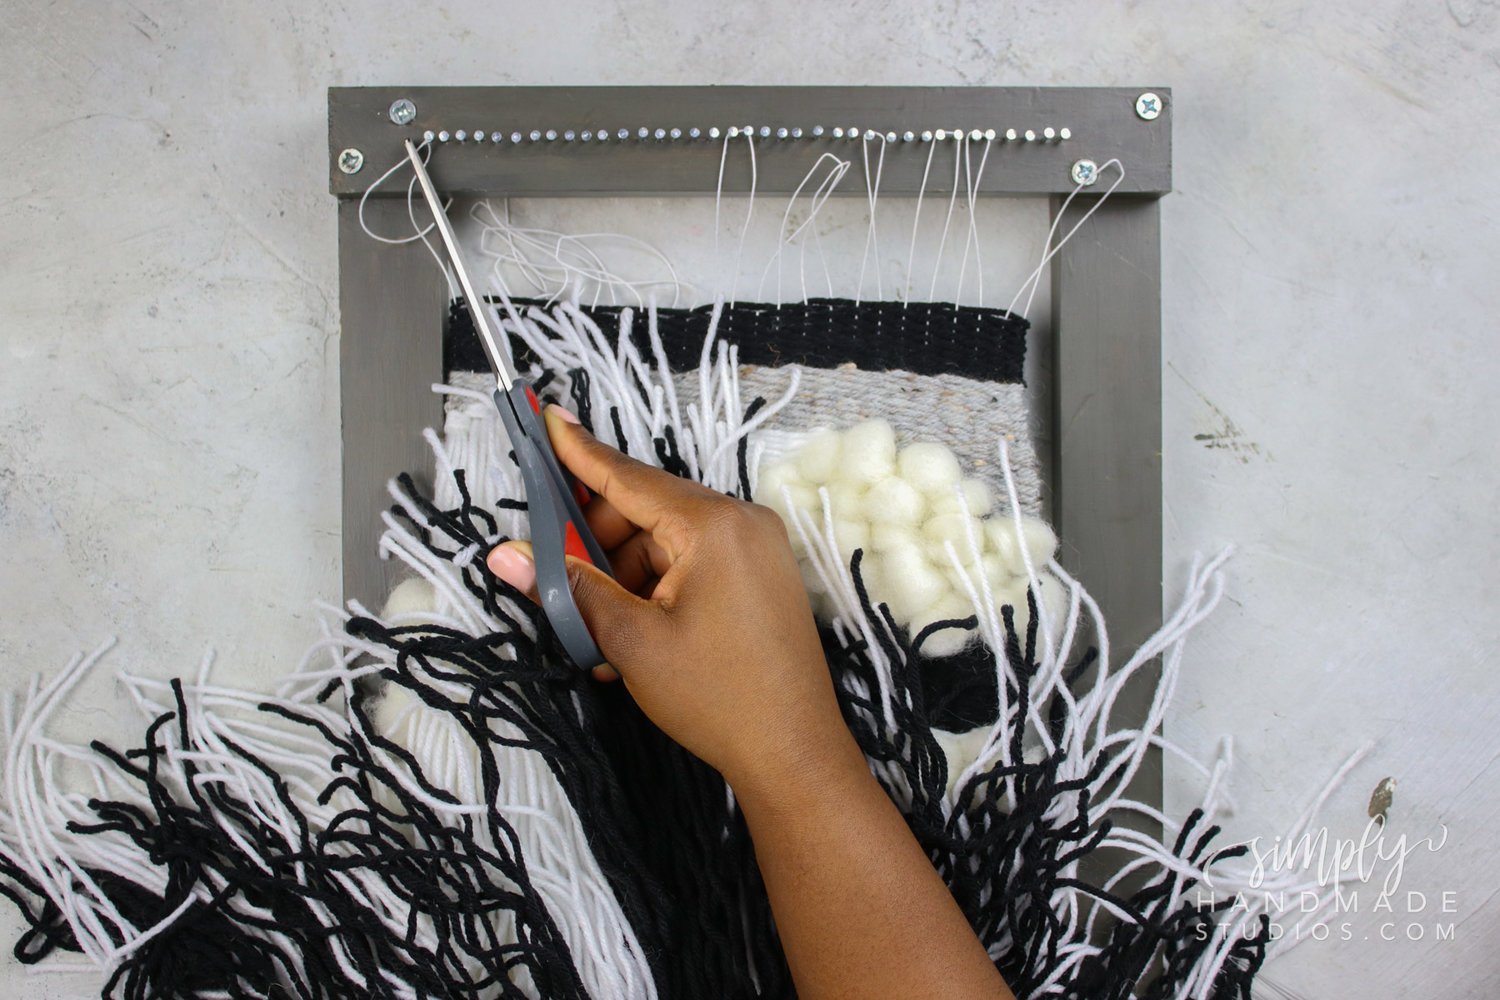
Start taking the weaving off from the bottom. I cut the knot I made on the end and used a fork to gently pry off the loops from the nails.

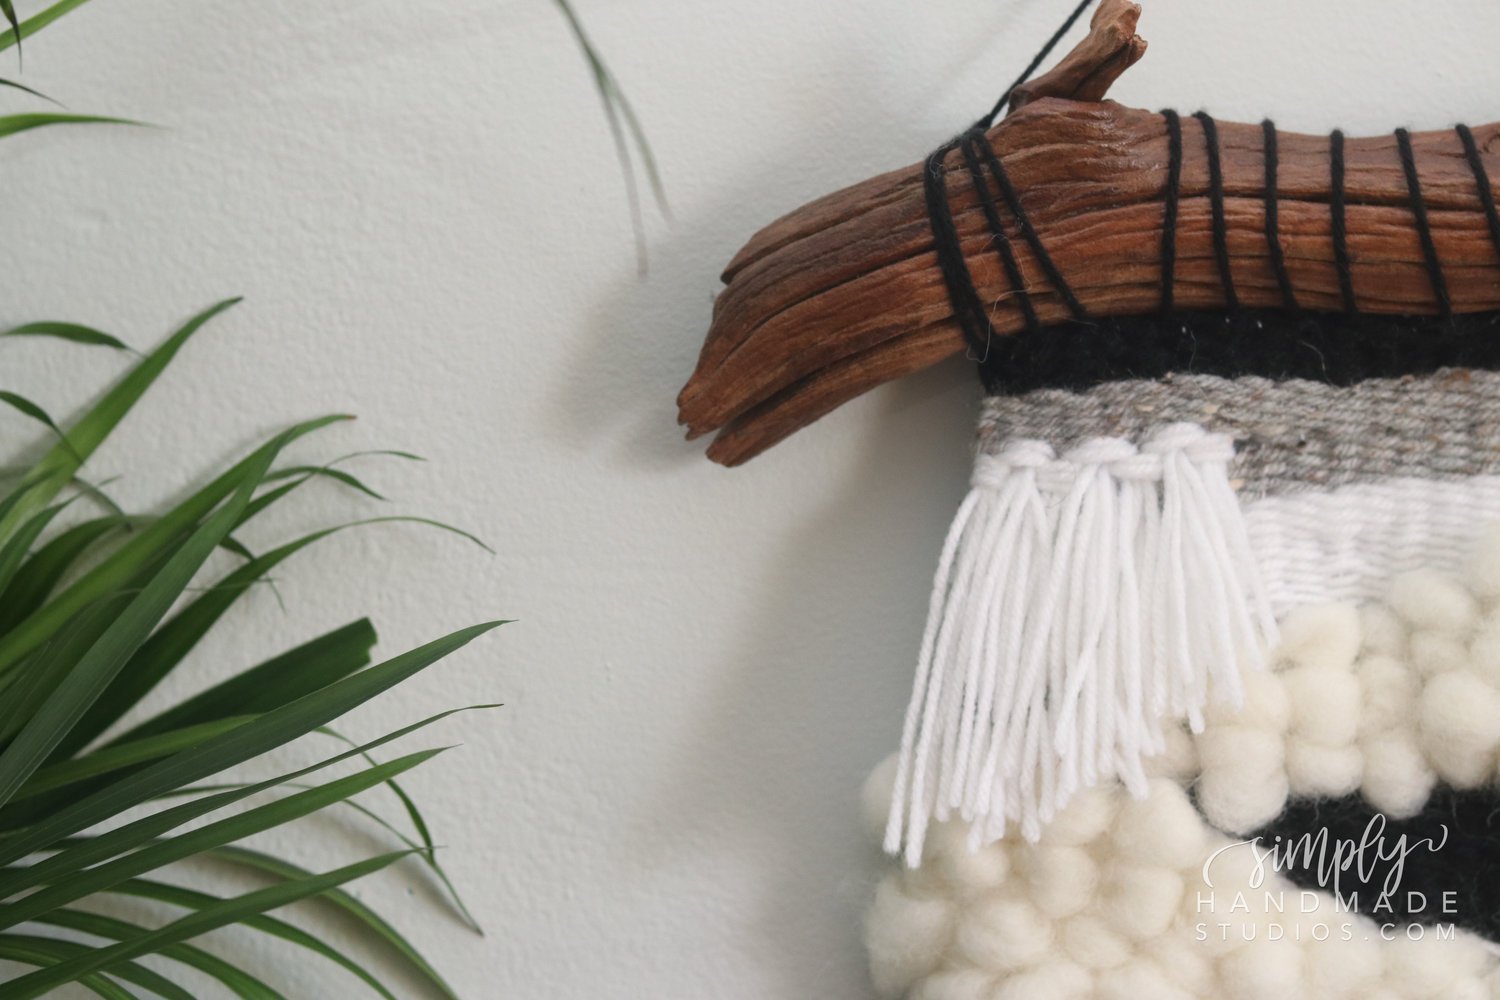
After everything was loose, I tied a knot on each of the loops and repeated the same for the top. I did combine the single thread and a loop for a secure hold.

The back of the wall hanging will look messy like this so I just cleaned it up by tying the roving together and using the needle to string some yarn through the loops and cut off the excess. I did the same with the top loops that were hanging and attached this branch to it and that’s it!


I couldn't end this blog post with this photo! I had my little helper with me the entire time I was styling this shoot. I love this little guy (and his brother, of course!)


I hope you enjoy this and I hope it gets you inspired to get out and create! This wall decor is so beautiful and I'm loving this "trend".