
How To Make Wedding Invitations at Home
I've recently hosted a styled shoot with amazing vendors in the NYC area which I'll be featuring on the blog and my YouTube channel! First up? WEDDING INVITATIONS (if you couldn't already tell by the title) hehe.

Photo Credit: Studio A Images (@StudioAimages)
Materials Needed for This Project:
Chipboard: This is needed for the main backing. Regular Cardstock is too flimsy for this project. But hey, it doesn't hurt to test it out just in case I'm wrong!
Leafing: I used copper leaf for these invites, but they come in gold and silver, too! If you leaf, you'll need to grab some leafing adhesive, too!
Envelopes: I typically get mine from paperandmore.com or cardsandpockets.com. Make sure to grab a bout 10% more than you need just in case of mistakes! Don't forget to grab both the mailer envelope and RSVP envelopes, too!
Cute Design: I made this design you see here in Adobe InDesign. I got my watercolor flower design here.
* Links may be affiliate links
Tools Needed for This Project:
Hot Glue Gun
Glue Sticks
Paper Cutter
Foam Brush
Difficulty: Intermediate
Cost: $$
For the styled shoot, I wanted a watercolor look to these invites so I went online and searched watercolor flowers and chose an inexpensive package that had the exact colors and look I was going for.

I opened Adobe InDesign and made the document size 4.25" X 6.25" and made the bleed 0.25". I then created a box and inserted the text I wanted. I changed the main font to Trajan Pro, which is my go to font for wedding invitations. I then changed the bride and groom’s name to a script font called Poem Script Pro.

I dragged the flowers and greens that I purchased into InDesign and began arranging them the way I like. I periodically checked how the final version would look so I know if I like how it’s turning out. Once I liked how everything was arranged, I created a custom burgundy color for the names. I also added a stroke to the names to make them bolder. I printed out the invite and set it aside.

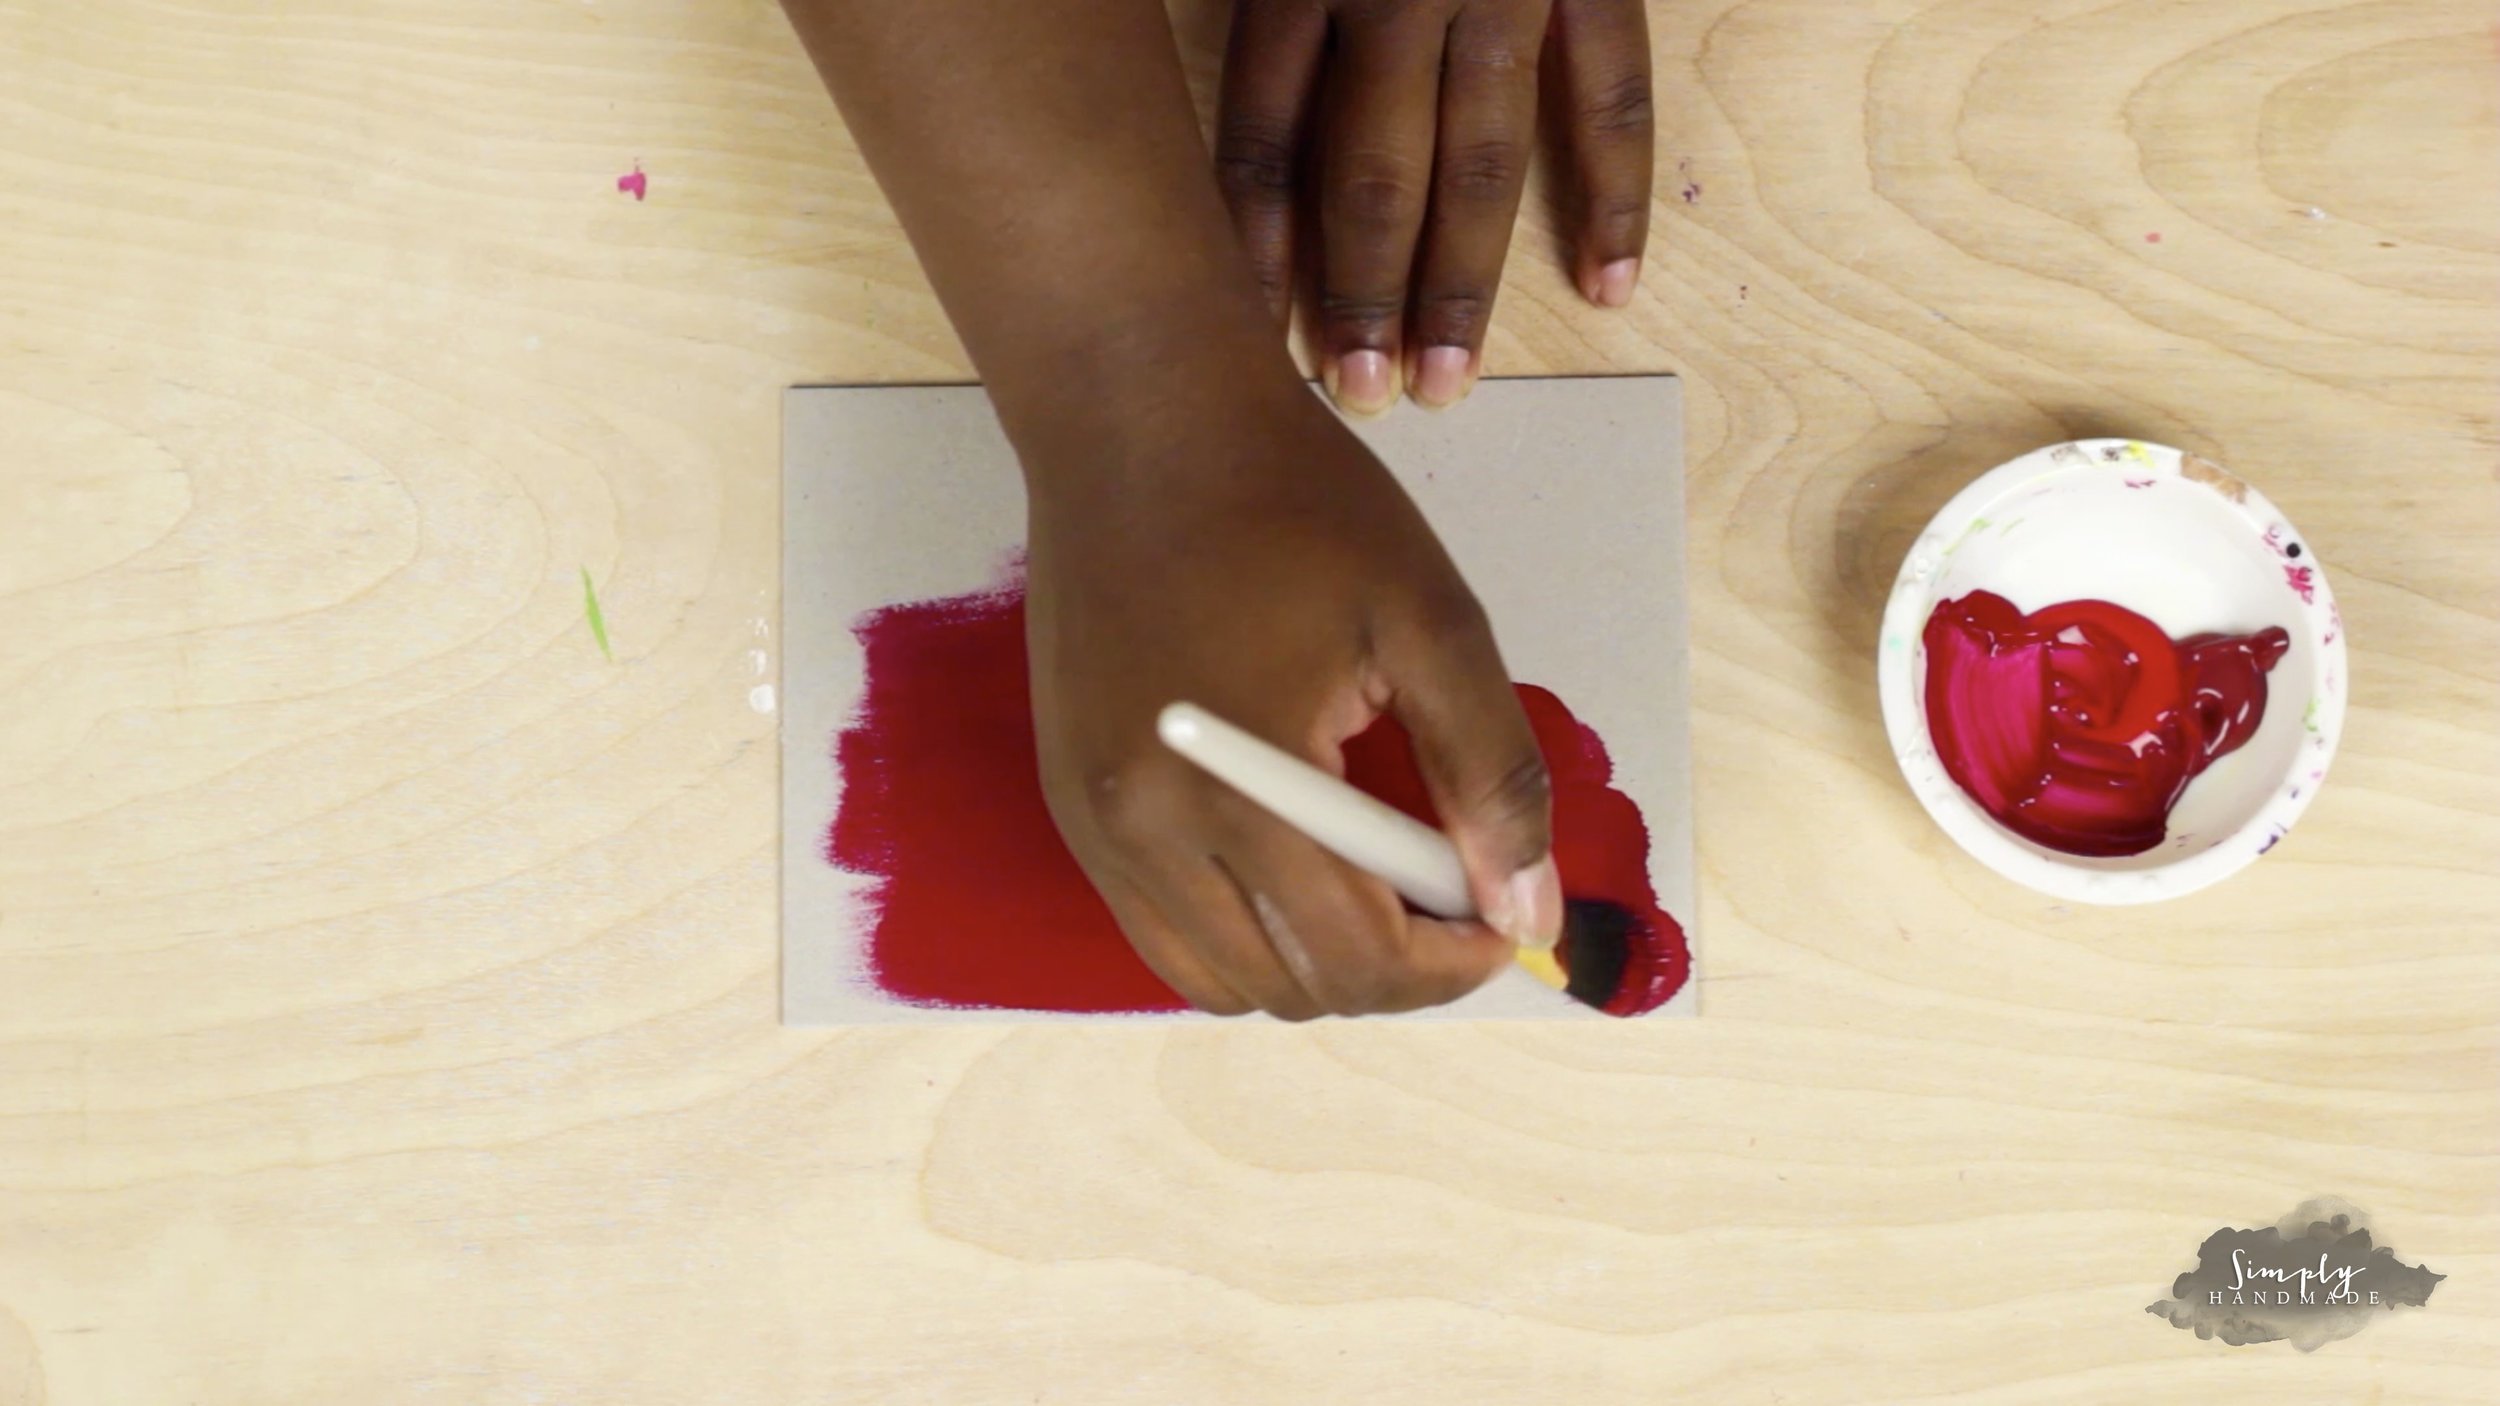
I then grabbed a piece of chipboard and cut it down to 5.0" X 7.0". I do wish i cut it a bit smaller since it fit too snug in the envelope. I mixed a deep burgundy and a red to make a shade that matched the flowers on the invitation. I then painted the front, sides, and back of the chipboard and let it dry.
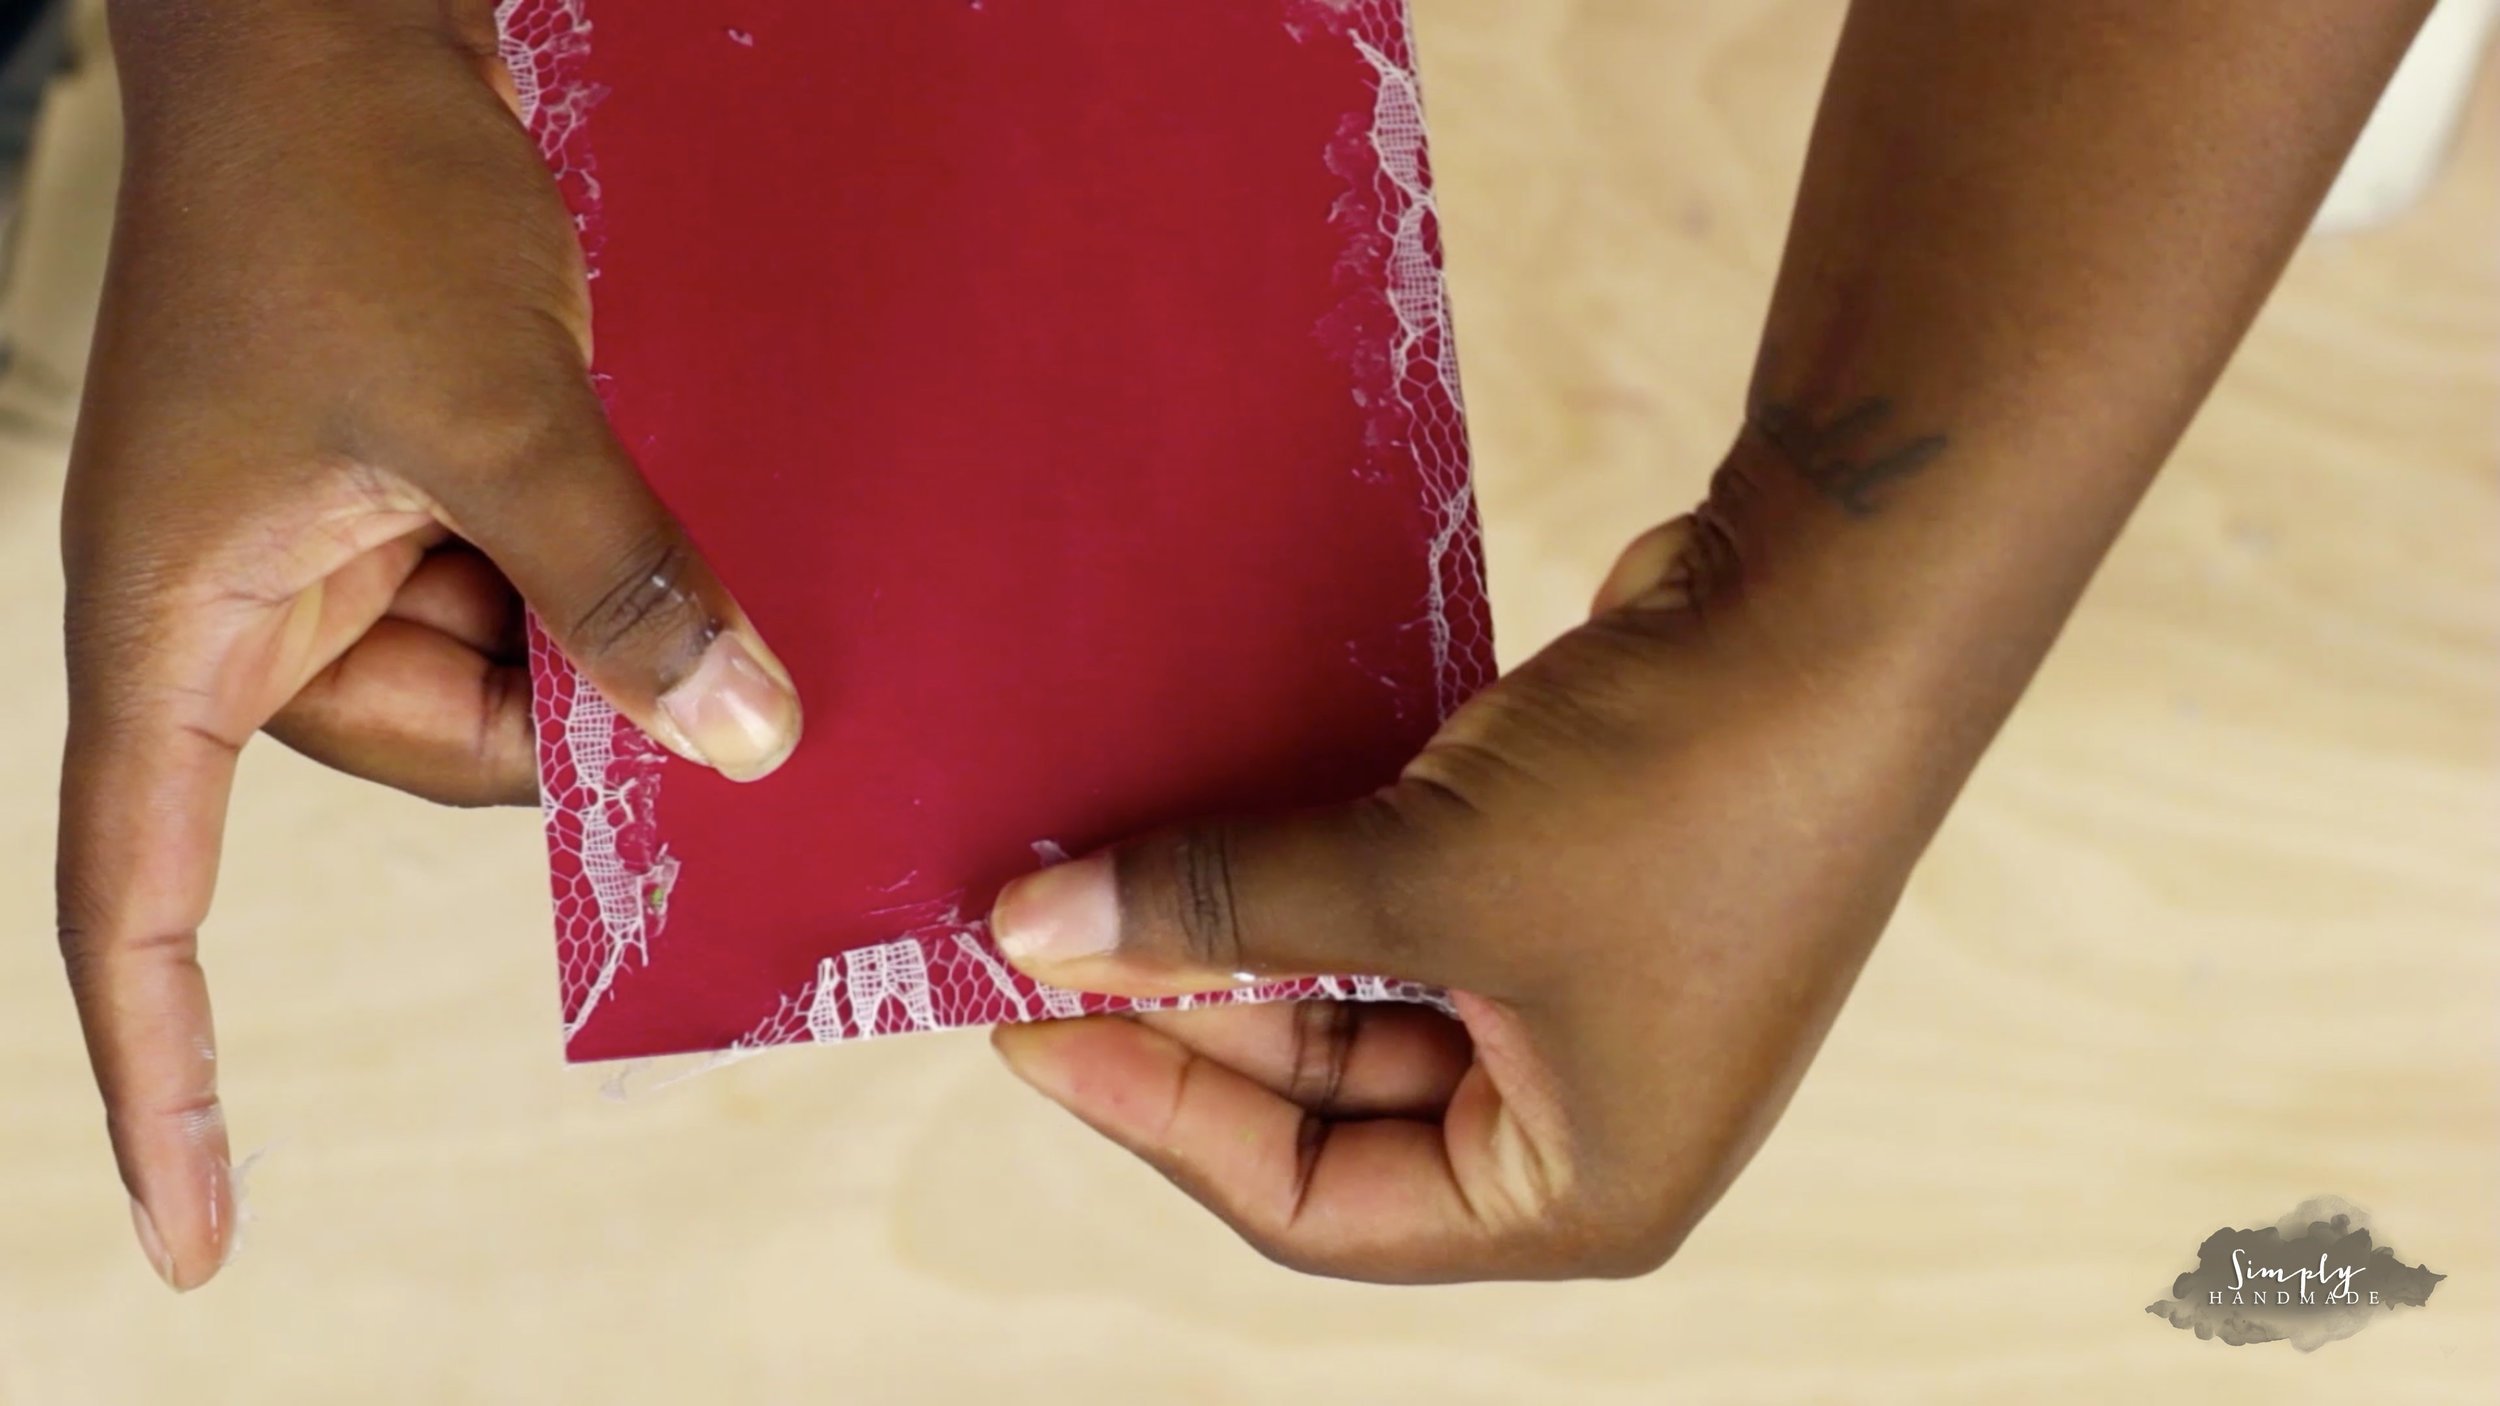
I wanted to add lace detail on the back of the invitation and RSVP cards, so I put some Modpodge on the back of the chipboard and let it dry a bit then tried to add the lace. Letting it dry wasn’t a good idea so I added some more Modpodge and added the lace when it was wet and let it dry and it worked just fine.

Once the back had some time to dry, cut the lace down and cut the edges about 45 degrees. I then used some hot glue to glue down the lace - I placed some glue where the edge of the lace would be and swiped it toward the center and repeated this for the rest of the sides.
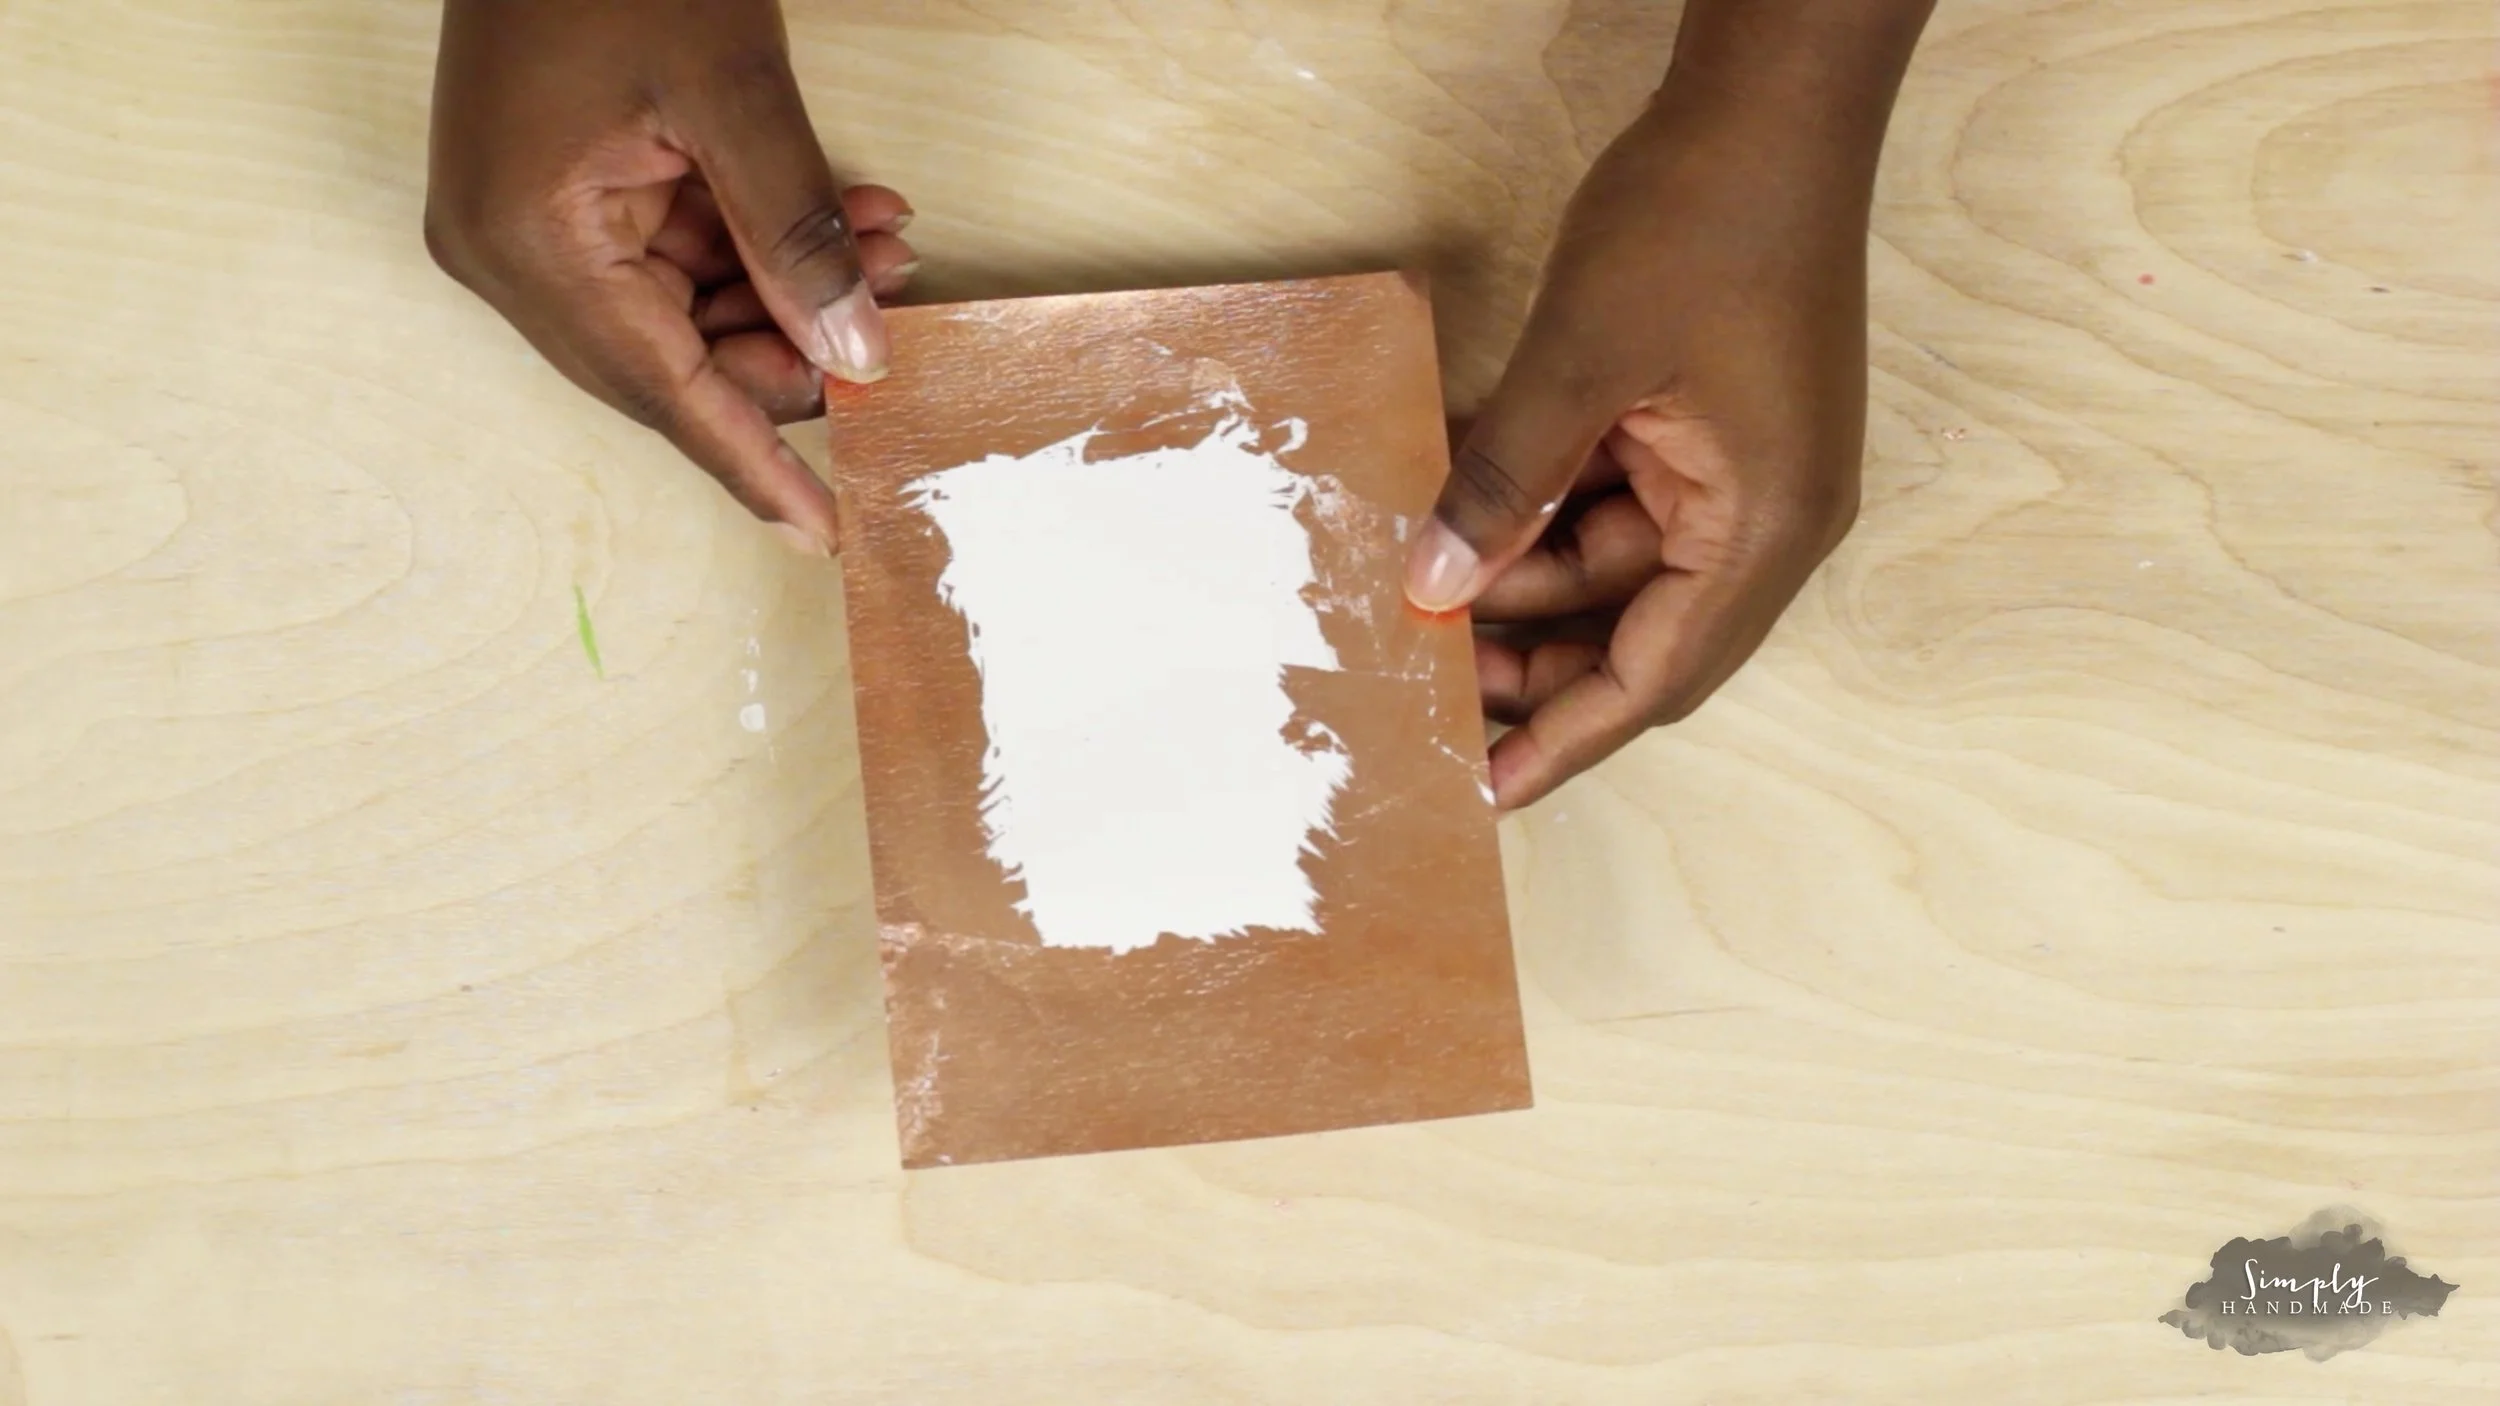
Once the lace is secured down, I grabbed a piece of paper that already had some leafing adhesive and pressed copper leaf into the paper. I removed the excess and cut it down to size approximately 4.5" X 6.5".
I added some double sided tape to the invitation and placed that on top of the copper paper. I then took the invitation and copper combo and hot glued it onto the chipboard.

I repeated the same steps for the RSVP card. Here are the dimensions I ended up with for the RSVP. Again, it fit quite snug in the envelope so I recommend either placing the invitation in a box, or sizing down each layer by 0.25" (this goes for the main invitation as well).
CHIPBOARD LAYER: 3.5” X 5”
COPPER LAYER: 4.75” X 3.25”
MAIN INVITE LAYER: 4.25” X 2.75”
Please check out my YouTube video showing you how to create these gorgeous invitations:
I want to take some time out to thank the amazing vendors I worked with during my styled shoot! I am beyond blessed to be able to see my work come to life in this way. If you're in the Staten Island or NYC area, check out these amazing vendors. I've added their instagram handles so you can check them out there as well!
Venue: Celebrate at Snug Harbor (@celebrateatsnugharbor)
Photographers: Studio A Images (@studioaimages) and Zee Younes Photography (@bklyn_zee)
Flowers: (@flowermoxie)