
Art | Metallic Gold Contemporary Art (Plus a FREE Printable!)

Art | Gold Contemporary Art
This Art piece is so beautiful and near and dear to my heart. I was inspired to make this metallic gold contemporary art while I was sleeping. Do you know when you just have a creative spark out of nowhere? Well This is what happened to me - I literally got up, drew in my notepad just enough so I wouldn't forget what I envisioned, and the next day I thought "can this really be done?"
Needless to say it was a success and I executed it exactly as I felt God told me to do it. If you're a non-believer, it might sound weird to read that God spoke to me but he did! I am completely convinced I didn't just make it for myself to remind me of His Amazing Grace, but to bless anyone who comes across this. If you're reading this you're probably curious how I made this so let's get into the tutorial.
Materials:
1x6x8 pine wood
1x2x6 pine wood OR kreg jig pocket hole system & corresponding screws
stain (optional) I used "Special Walnut"
Leafing (I used copper, but there are options for gold and silver)
Pencil
Stencil of your word or phrase (free printable at the end of this post)
Screws
Paint (white or your choice of color)
Instructions:

I measured and cut the 1x6x8 pieces of wood into 24 inch pieces. I wanted the final size to be approximately 21" x 24" so I stacked 3 pieces on top of each other.

I also cut two 1x2x6 pieces of pine wood slightly smaller than the art piece to approximately 15 inches.


I glued the 1x6 pieces together then glued the 1x2's right on top.

I wanted to drill the 1x2's into the 1x6 pieces of wood but the screw I had on hand was too small. I decided to tape the 1x6's together and drill into the wood so my screw can fit into both pieces of wood. Confused? Be sure to check out the video tutorial.


I first started with a drill bit the same size as the body of my screw, then went in just enough where the screw could grab onto both pieces of wood. I taped the drill bit to help guide me and not let me drill to far down.
By doing this, I was able to successfully screw into both pieces of wood.
If you have a Kreg Jig, you can skip this altogether! Just use pocket holes to attach the 1x6's together. I would have done that but at the time I didn't have a kreg jig, so this is a nice alternative!


I wanted a slightly darker stain than the natural wood color so I went with "Special Walnut" by Minwax. I love how this color looks (especially against the metallic color, but let me not get too ahead of myself!!)

I printed out the amazing grace quote I made (I used Jacques & Guilles font for the amazing and Garamond Pro for Grace). I passed the pencil on the back, taped it to the wood, and traced the letters.

After I traced the letters, I went back over the indent with a pencil so I could see better for the next step.

I used a thin paint brush and went around the letters with some leading adhesive. I was careful to make the outline as smooth as possible.

I chose copper leafing to make this piece. I placed it on top of the leading adhesive after it had some time to dry. You’ll know when the adhesive is ready because it will dry clear.

At first I thought it would be cool to have a light wash of white paint for the letters.
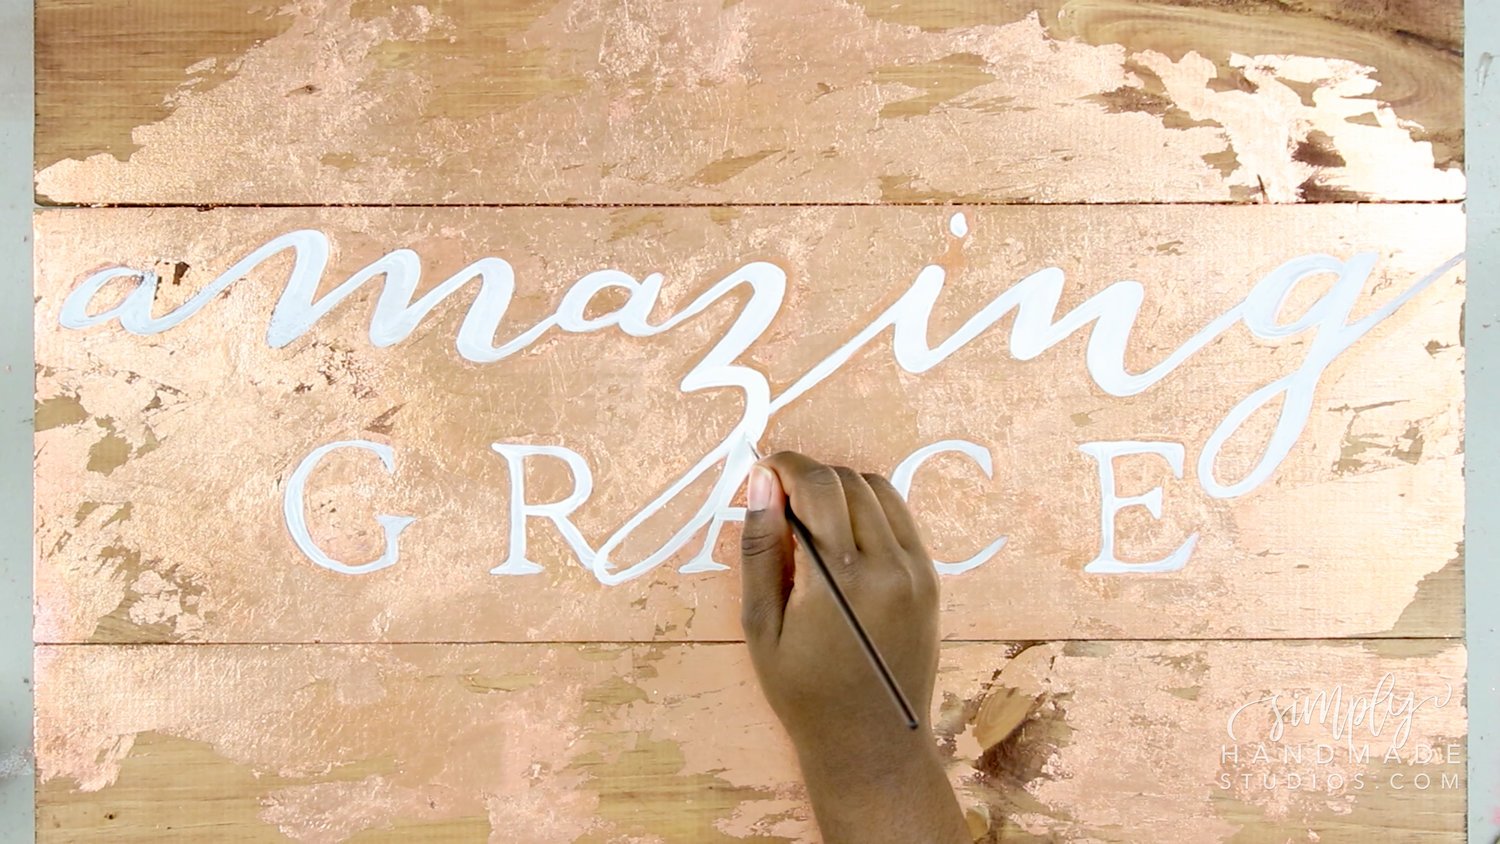
I had a hard time reading the words so I built up the intensity of the white letters until it was nice and opaque.

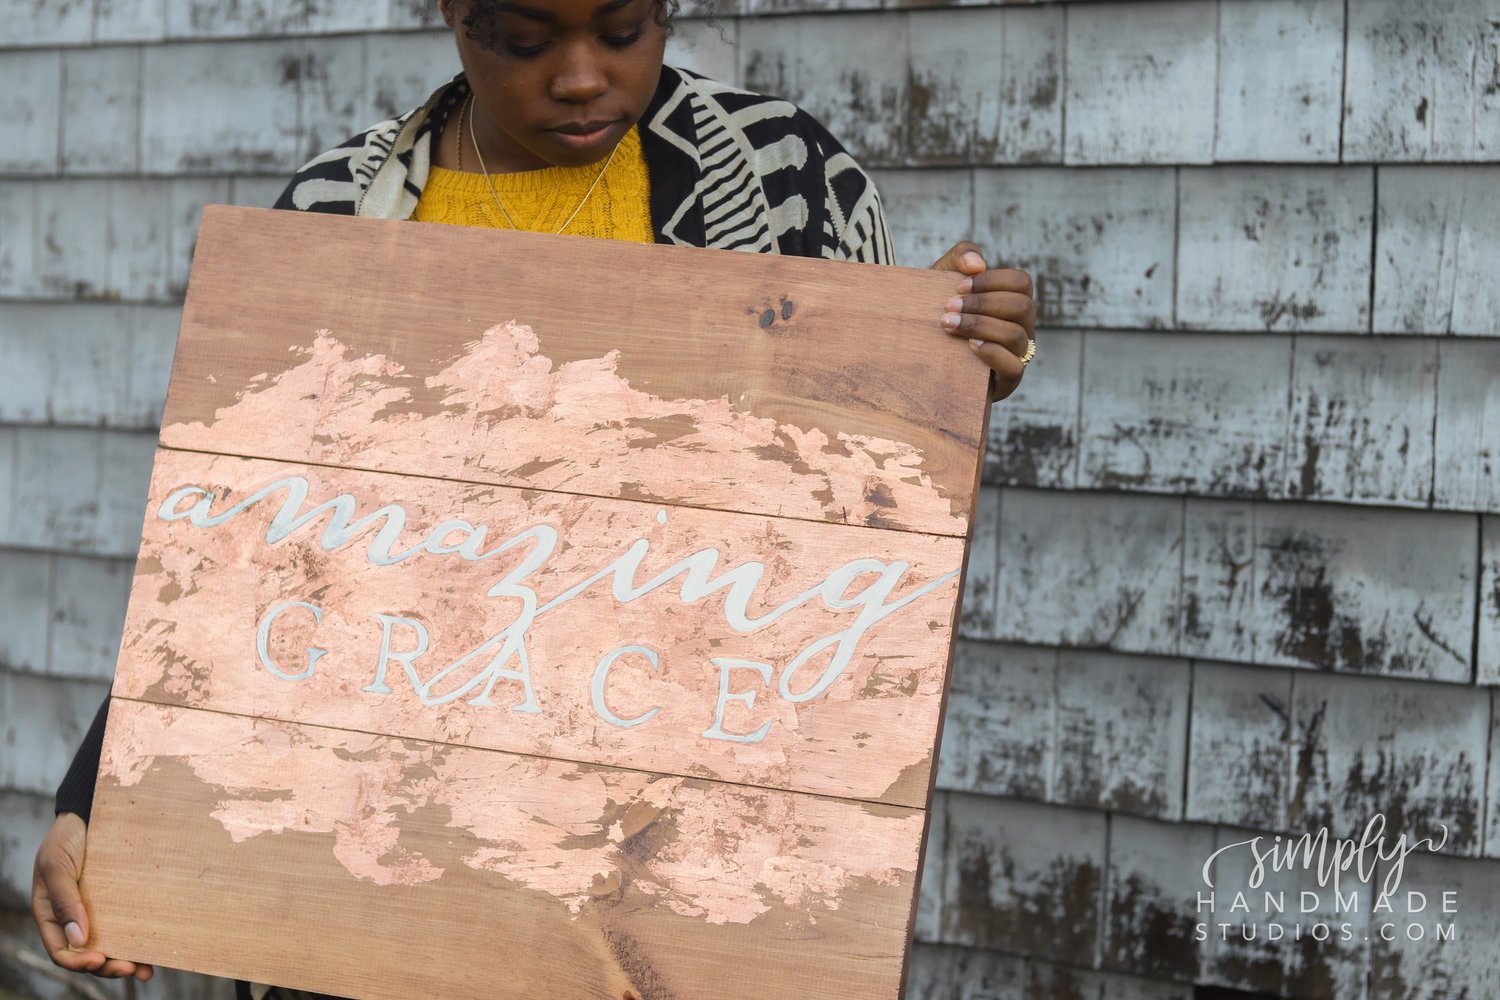
I hope you guys love the final product. I am OBSESSED with how this came out and I hope the words encourage and bless you!
Want the "amazing Grace" letters I used for my DIY? Download your free PDF:
Amazing Grace PDF letters, corresponding to the blog post and video. Free.
Want to see how I did it? Watch the video: