
How To Build Barn Doors
Can I be honest with you? While I was building the storage cabinets, I literally had no clue how I wanted the doors to look. I finally found the perfect inspiration photo about midway through building the second storage cabinet and here I am - sharing it with you guys!
Oddly enough the photo wasn't even a house door - it was some sort of garage door or a door to a resort of some sort, but when I saw it I KNEW i had to make my own! Of course mine is made with different material but it's a similar concept!
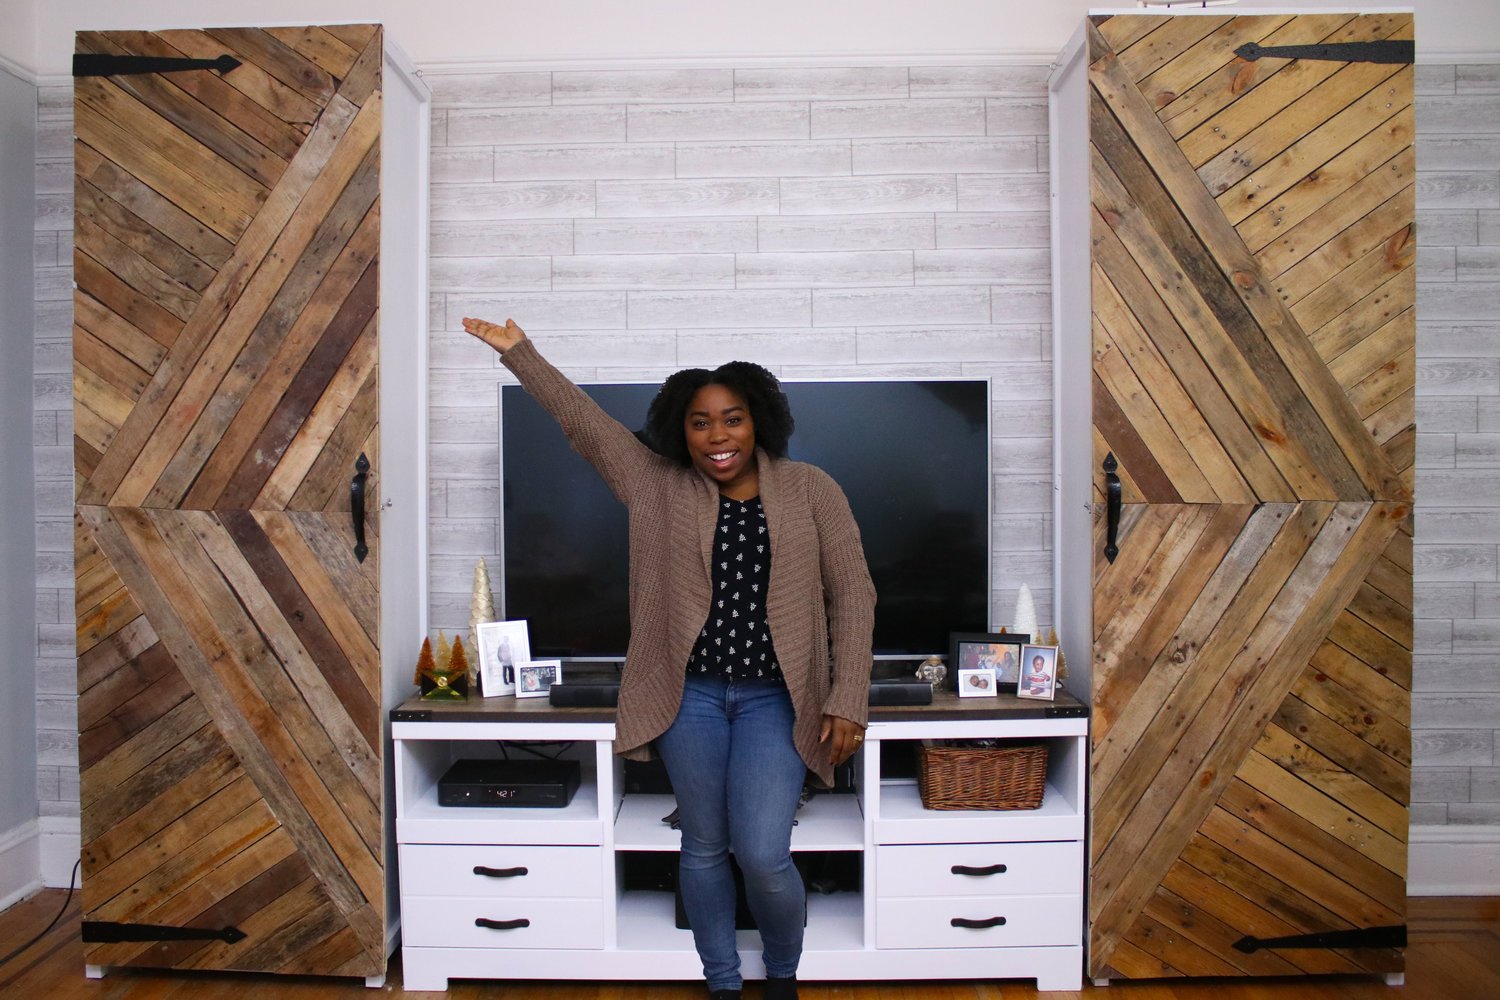
For size reference I'm 5'0" - these doors are about 7 feet tall!
Materials Needed for This Project:
Wood Pallets (Roughly 6-8) Make sure you choose wood that you would like to see on your finished door! This may take some time (especially if you want sun bleached & distressed wood). 60-70 full length pieces should be more than enough!
1/4 Inch Plywood
1x3x8 Pine Wood
Wood Stain and Rag - I used Varathane's Kona
Polyurethane - I used clear matte
Paint Brush
Construction Adhesive aka Liquid Nails - you'll need about 5 bottles for this length/width doors
1-1/4 inch Wood Screw
3/4-in Brad Nails
120 grit Sandpaper
Nail embedded blade - for reciprocating saw
Eye and Ear Protection
Clamps
Wood Glue
Door Handles - comes with decorative appliques
* links are affiliate links
Cost: $$$$ (tools are expensive!)
Difficulty: Intermediate
Tools Needed for This Project:
Fostner Drill Bit (for cabinet hinges) - this will depend on the size specified in the instruction packet.
Instructions:
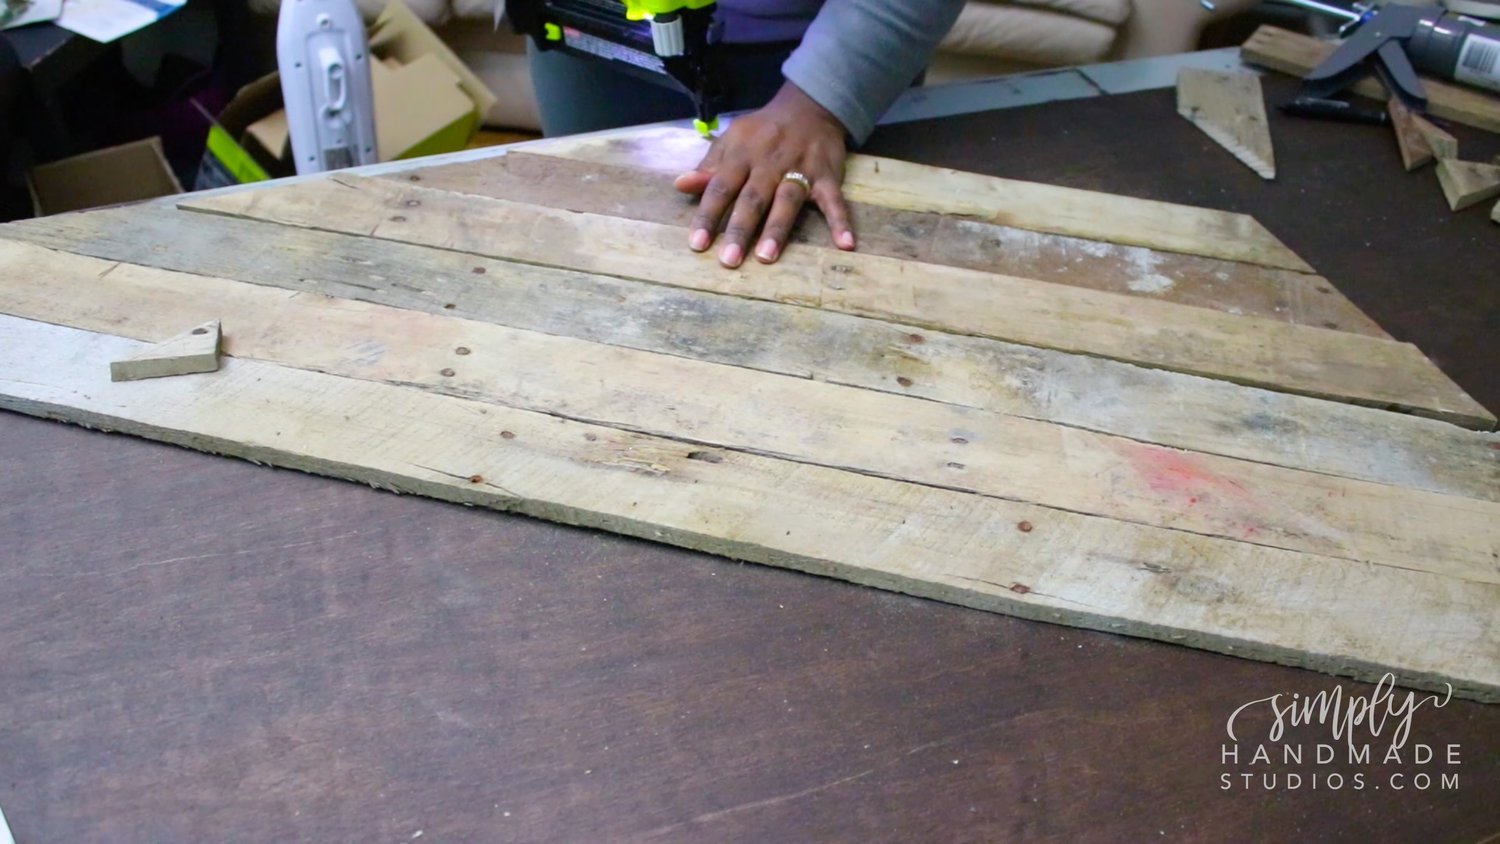
The first thing you'll want to do is break down the pallets. I wanted to have the nails show in my final design so I opted to maintain the entire length of the pallet boards. I felt I didn't do this correctly so I recommend referencing this YouTube video that will show you how to break them down a few different ways. One thing I would recommend is to get a corded reciprocating saw. I got the ones with batteries and the batteries kept dying within 10 minutes - I tried another saw, using different batteries, etc. I feel if I had a constant flow of energy, it might have saved me much more time!
To make these barn doors, I purchased quarter inch plywood and cut it down to the size of my doors (29" x 87"). I laid the plywood down and drew a rough sketch of the design I wanted.


Once I have an idea of how it would look I knew I would like the design so I went ahead and stained the wood front and back with Varathane's Kona - I chose to go dark enough to match majority of the wood but not too dark (like black) since I think it would look off.


Image 1: Outline for Door (left). The opposite door (right) should mirror the above image.
I ended up drawing out the guidelines again by finding the midpoint of the wood and drawing a straight line, then connecting the outer edges to the center (diagonally). See Image 1 above.

Image 2: Diagonal Pallets (Top)

Image 3: Diagonal Pallets (Bottom)
I determined the angle I needed to cut the wood and added some construction adhesive. I placed it along the guide and clamped it down, then nailed it into place with a nail gun. Once you have this first guide piece down, you don’t have to clamp the rest down unless you’re adding another guide piece. FYI - there are 2 guide pieces for each door!


Notice the ends of the board has been cut down - I did this off camera so it would not be too much overhang.
I repeated the same for the other end and completed the rest of the design.
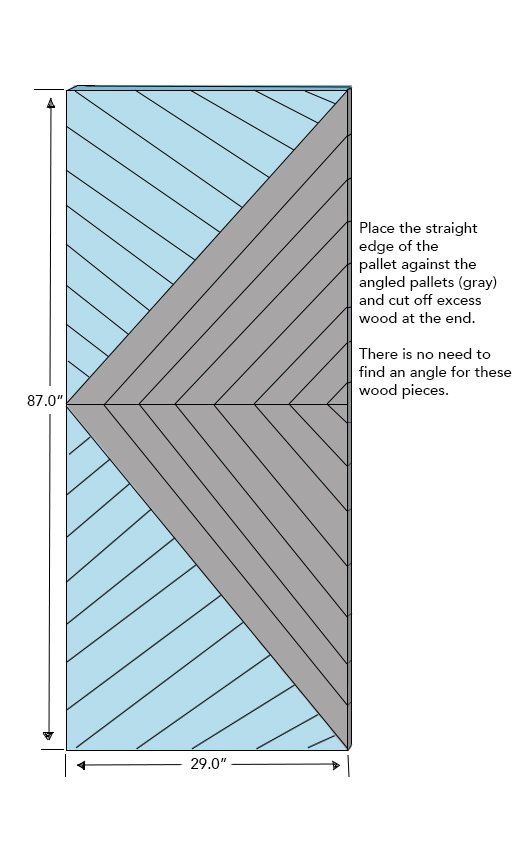
Image 4: Completed Door Design

Once the design was complete, I notice the door was pretty flimsy so I flipped it over and glued on a 1x3 piece of wood on the sides, top, and center and screwed it into place.
I wanted the middle to have support so I added some pocket holes on the ends of the middle boards and screwed them into the longer 1x3's to have something that looks like this.


I took the door outside, face down and used a circular saw to remove the excess overhang.

After I trimmed down the doors, I added 3 coats of poly and let it sit overnight.

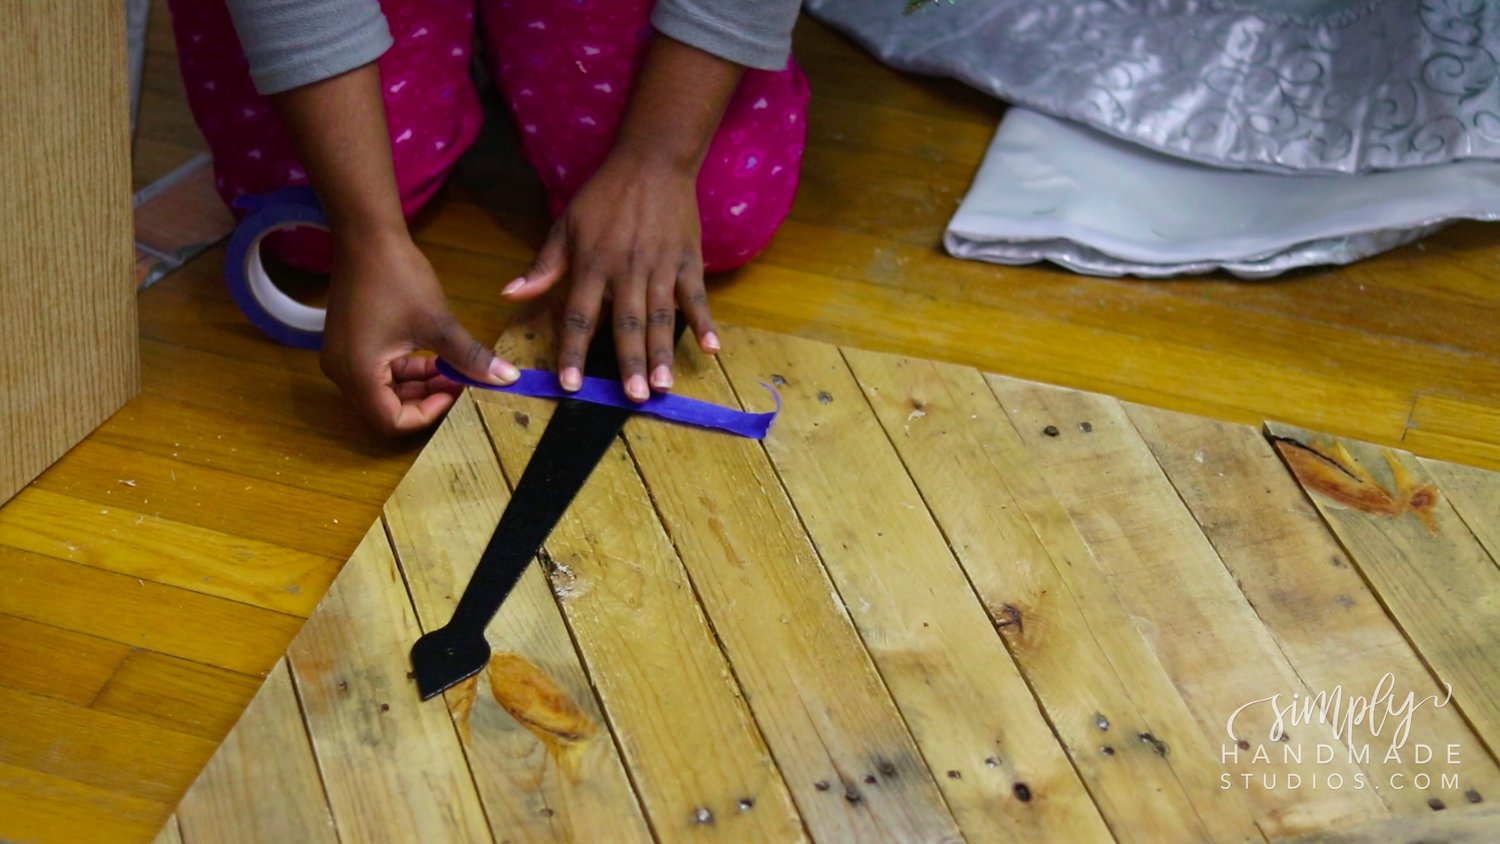
I wanted a little more to the doors so I added these garage door appliqués and handles according to the instructions they came with.
I didn’t quite know how to add these hinges, so I let my husband take it over.
I held the door while the cabinet was front face up and my husband made marks where the door and the cabinet will meet.

He made these holes with a fostner bit and screwed in the hinges and put the door back on the cabinet and screwed in the hinges. We referenced this YouTube video that was pretty good at explaining these hinges.I prayed and hoped the door wouldn’t fall off and it was good!
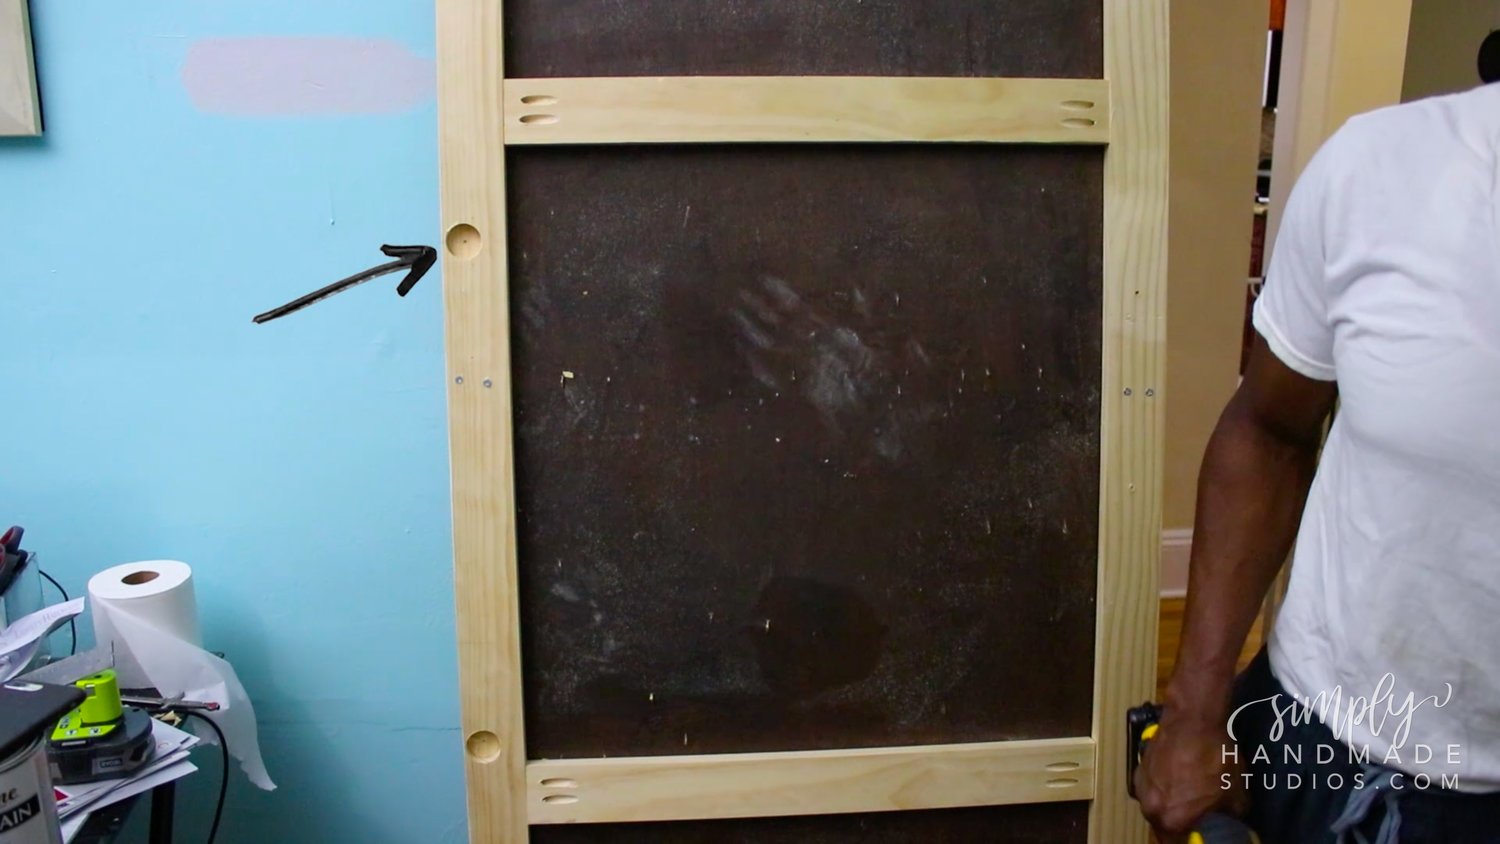
It did have this annoying squeaking so I took this knife hook thingie and shaved off the wood on the door that was pressing against the cabinet.. that pressing was making the annoying squeaking sound.

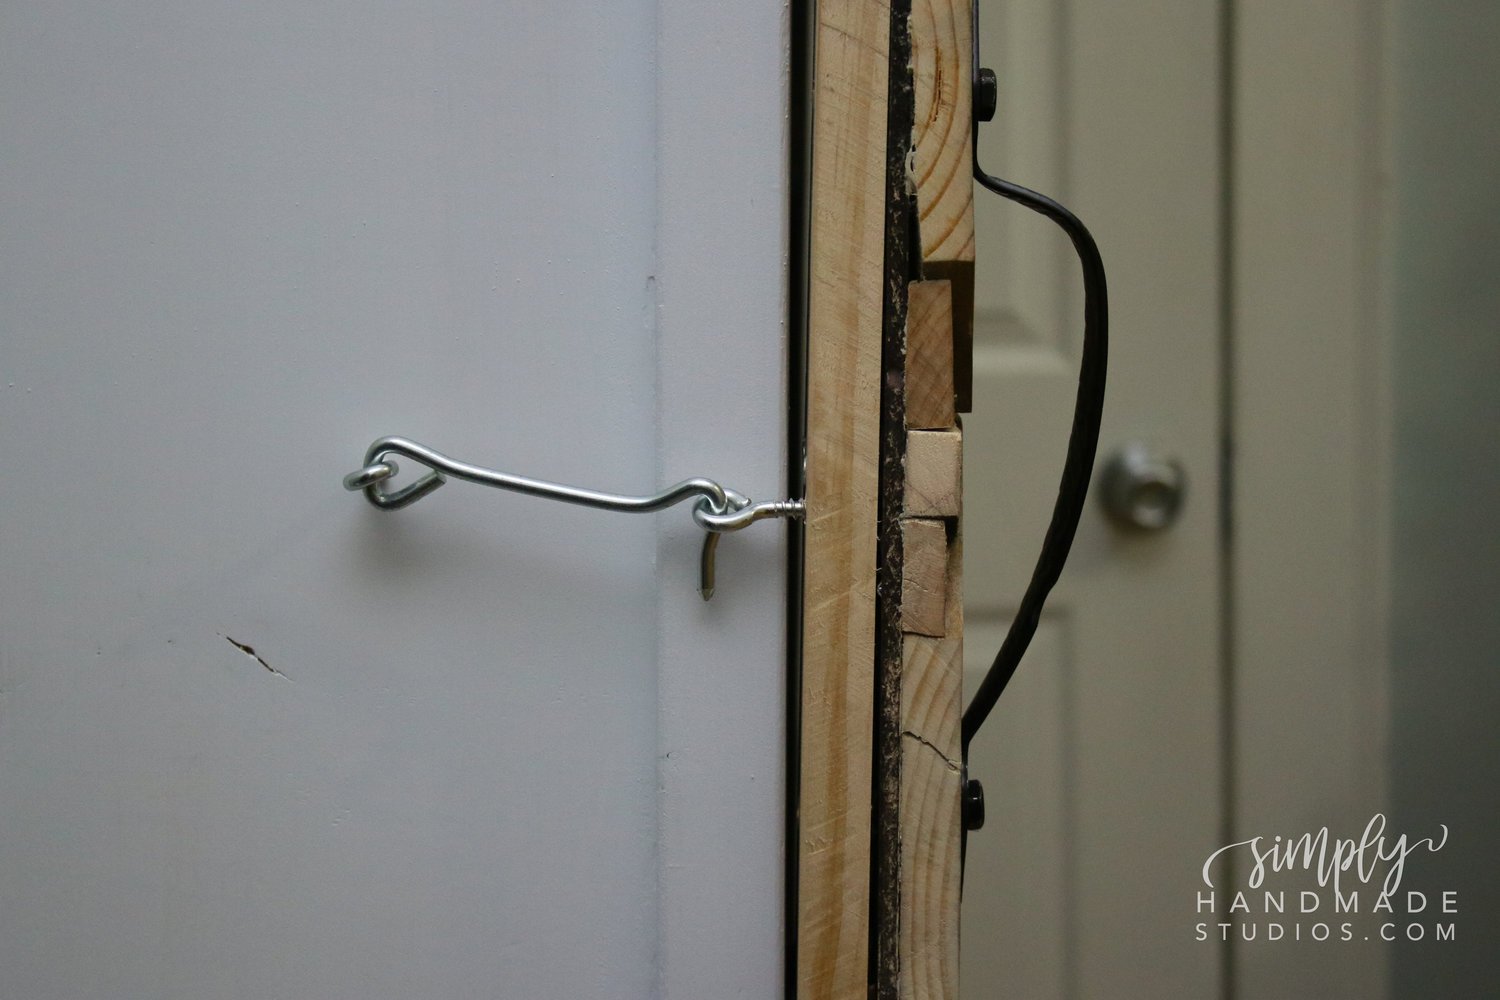
After I had the doors on I opted to put on these hook and eye latches since I have curious little ones that will constantly open and close these doors if they had the chance to.
Now I have to say, these doors are not perfect BUT they get the job done. There is a gap between the door and the cabinet and I think that’s because I don’t have a magnet holding it in place. I could be wrong but that’s my theory.

Also, there is a slight overhang on the door. Since it doesn’t cover the front completely like I anticipated (it’s because of the hinges, I think), there is overhang on the otherwise. Is it enough to bother me? Not at all but just keep this in mind when building yours!


I hope you guys enjoyed this post and my take on the barn doors. If you liked what you read, please feel free to share this post and pin away these pics!

I hope this inspires you to create! I literally cannot believe I made this! If I can, you definitely can, too!!