
DIY Plaster Flower Vase
DIY Plaster Flower Vase
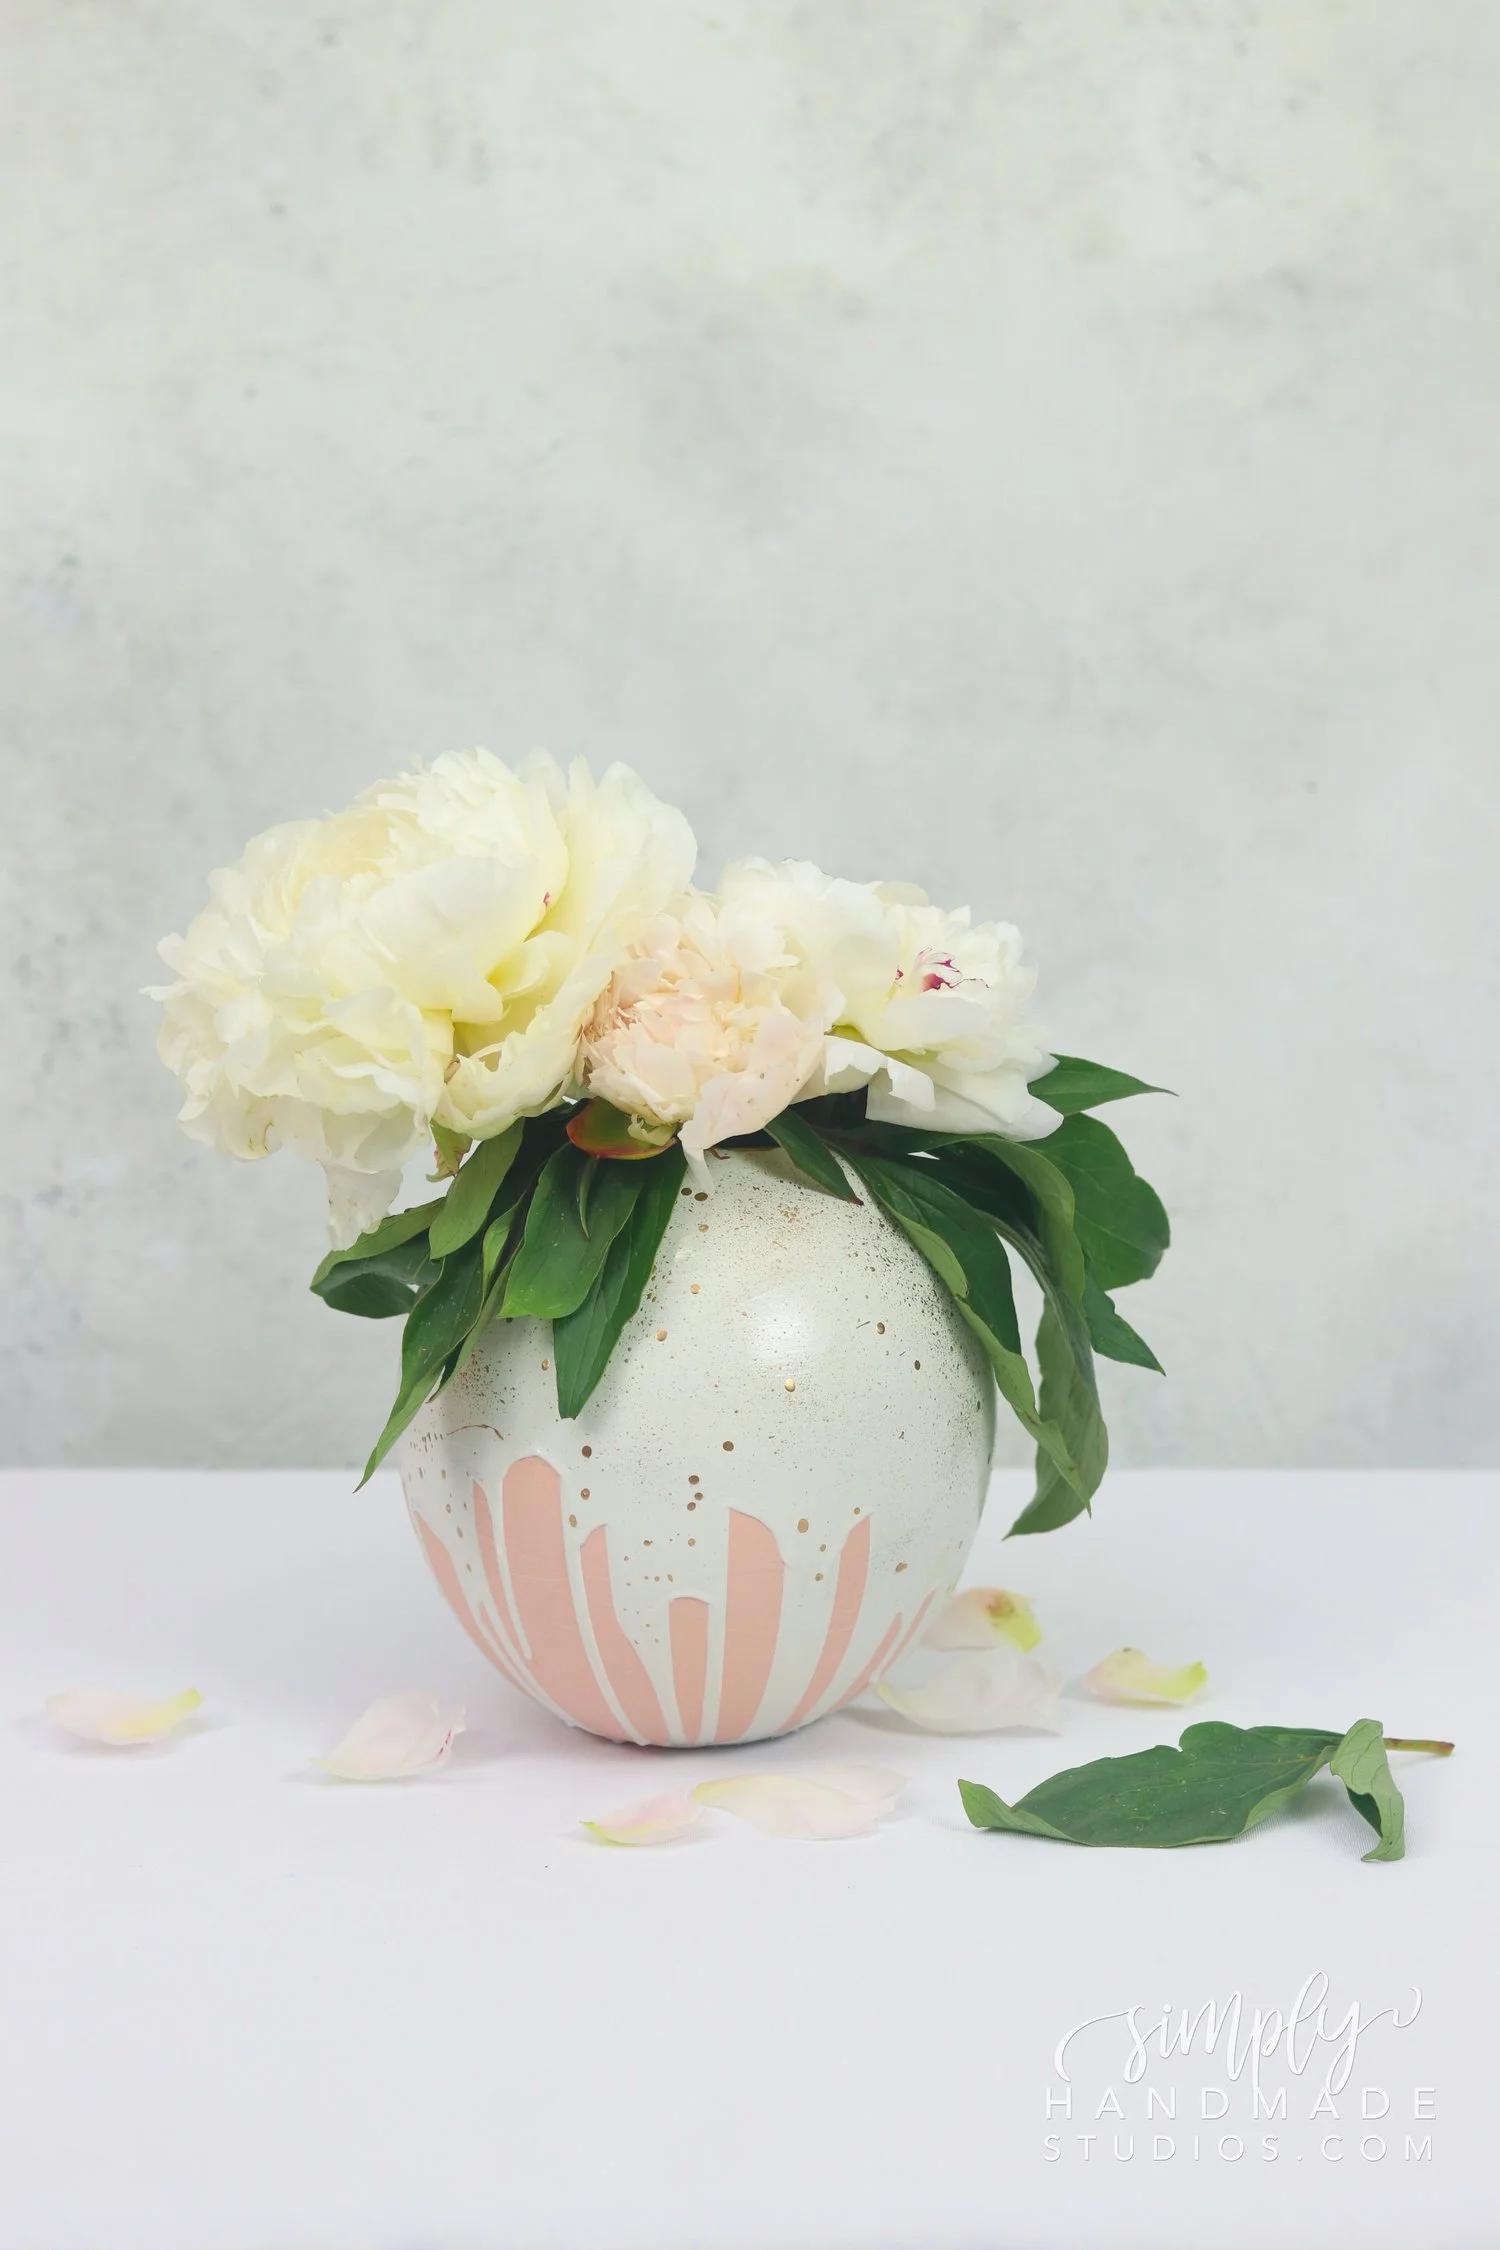
Who would have thought plaster, a balloon, and some paint would create such a gorgeous masterpiece?! This DIY Flower Vase is so gorgeous, and looks delicious, too! (cake pops anyone??) haha. This flower vase can be made for weddings, birthdays, Mother's Day, or any event you choose! Curious how I made my goregous DIY Plaster Flower Vase? Keep on reading...
Materials*
*Simply Handmade is a participant in the Amazon Services LLC Associates Program, an affiliate advertising program designed to provide a means for sites to earn fees by linking to Amazon.com and affiliated sites. Please view our full disclosure for additional information.
24 Inch Transparent Balloon
1 Cup Cold Water
2 Cups Plaster of Paris
Large Spoon or Stirrer
Container to Mix Plaster Mixture (I got mine from the dollar tree)
Your choice of Paint
Instructions:

To make this Plaster Vase, you’ll need Plaster, Water, a Funnel, a Balloon, a balloon pump, a spoon or something to stir the plaster mixture and a container to mix everything in.

I mixed 2 cups of plaster to 1 cup of cold water and mixed it until I had a relatively smooth melted ice cream like consistency.

I put the funnel in the balloon, poured the plaster in and knocked the sides of the funnel to get all of the plaster inside the balloon.
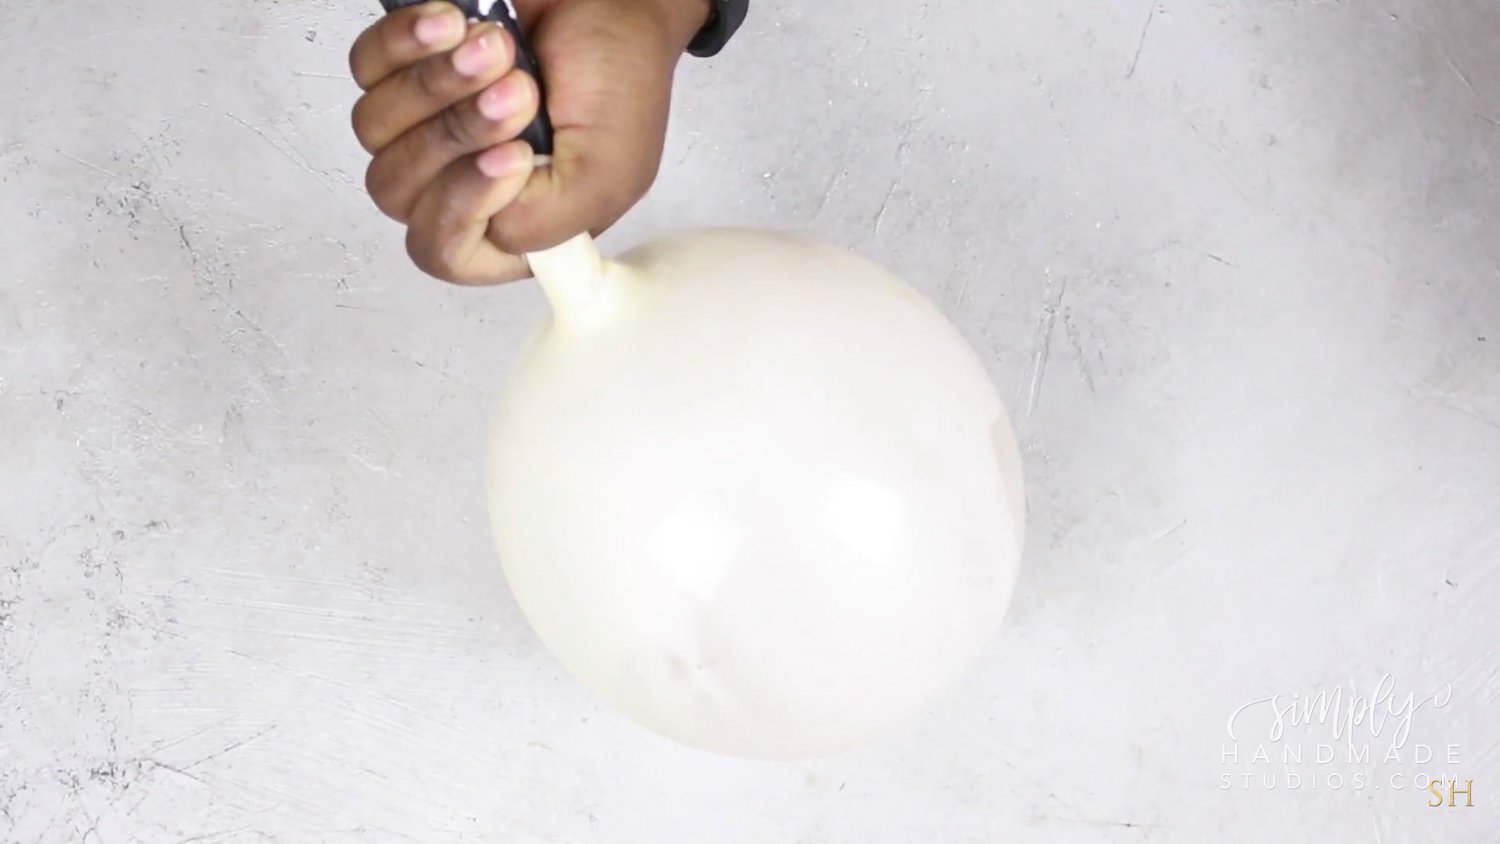
I pumped the balloon about 30 times to get the size I wanted and tied off the end. You’ll need to work quickly in these steps since the plaster hardens pretty fast.

After I tied off the balloon, I swished the plaster inside, making sure to cover everything and kept moving around until the balloon started getting a little hard. I placed it on a solid surface to form the bottom and let it sit overnight.
The next day, I popped the balloon and you should have a nice shape. It definitely takes practice so I suggest making a few of these balloon vases.


Once you pop the balloon, carve out the opening of the vase with a sharp blade or box cutter and smooth out the edges. It’s important to do this while the plaster hasn’t fully dried or you may break your vase like I did with this one.
Once the opening is done, set the vase aside to dry for another day. You’ll know it’s completely dry when the vase turns white.


I wanted this to be waterproof obviously so I used the waterproof sealant and poured it inside the vase and coated the outside.

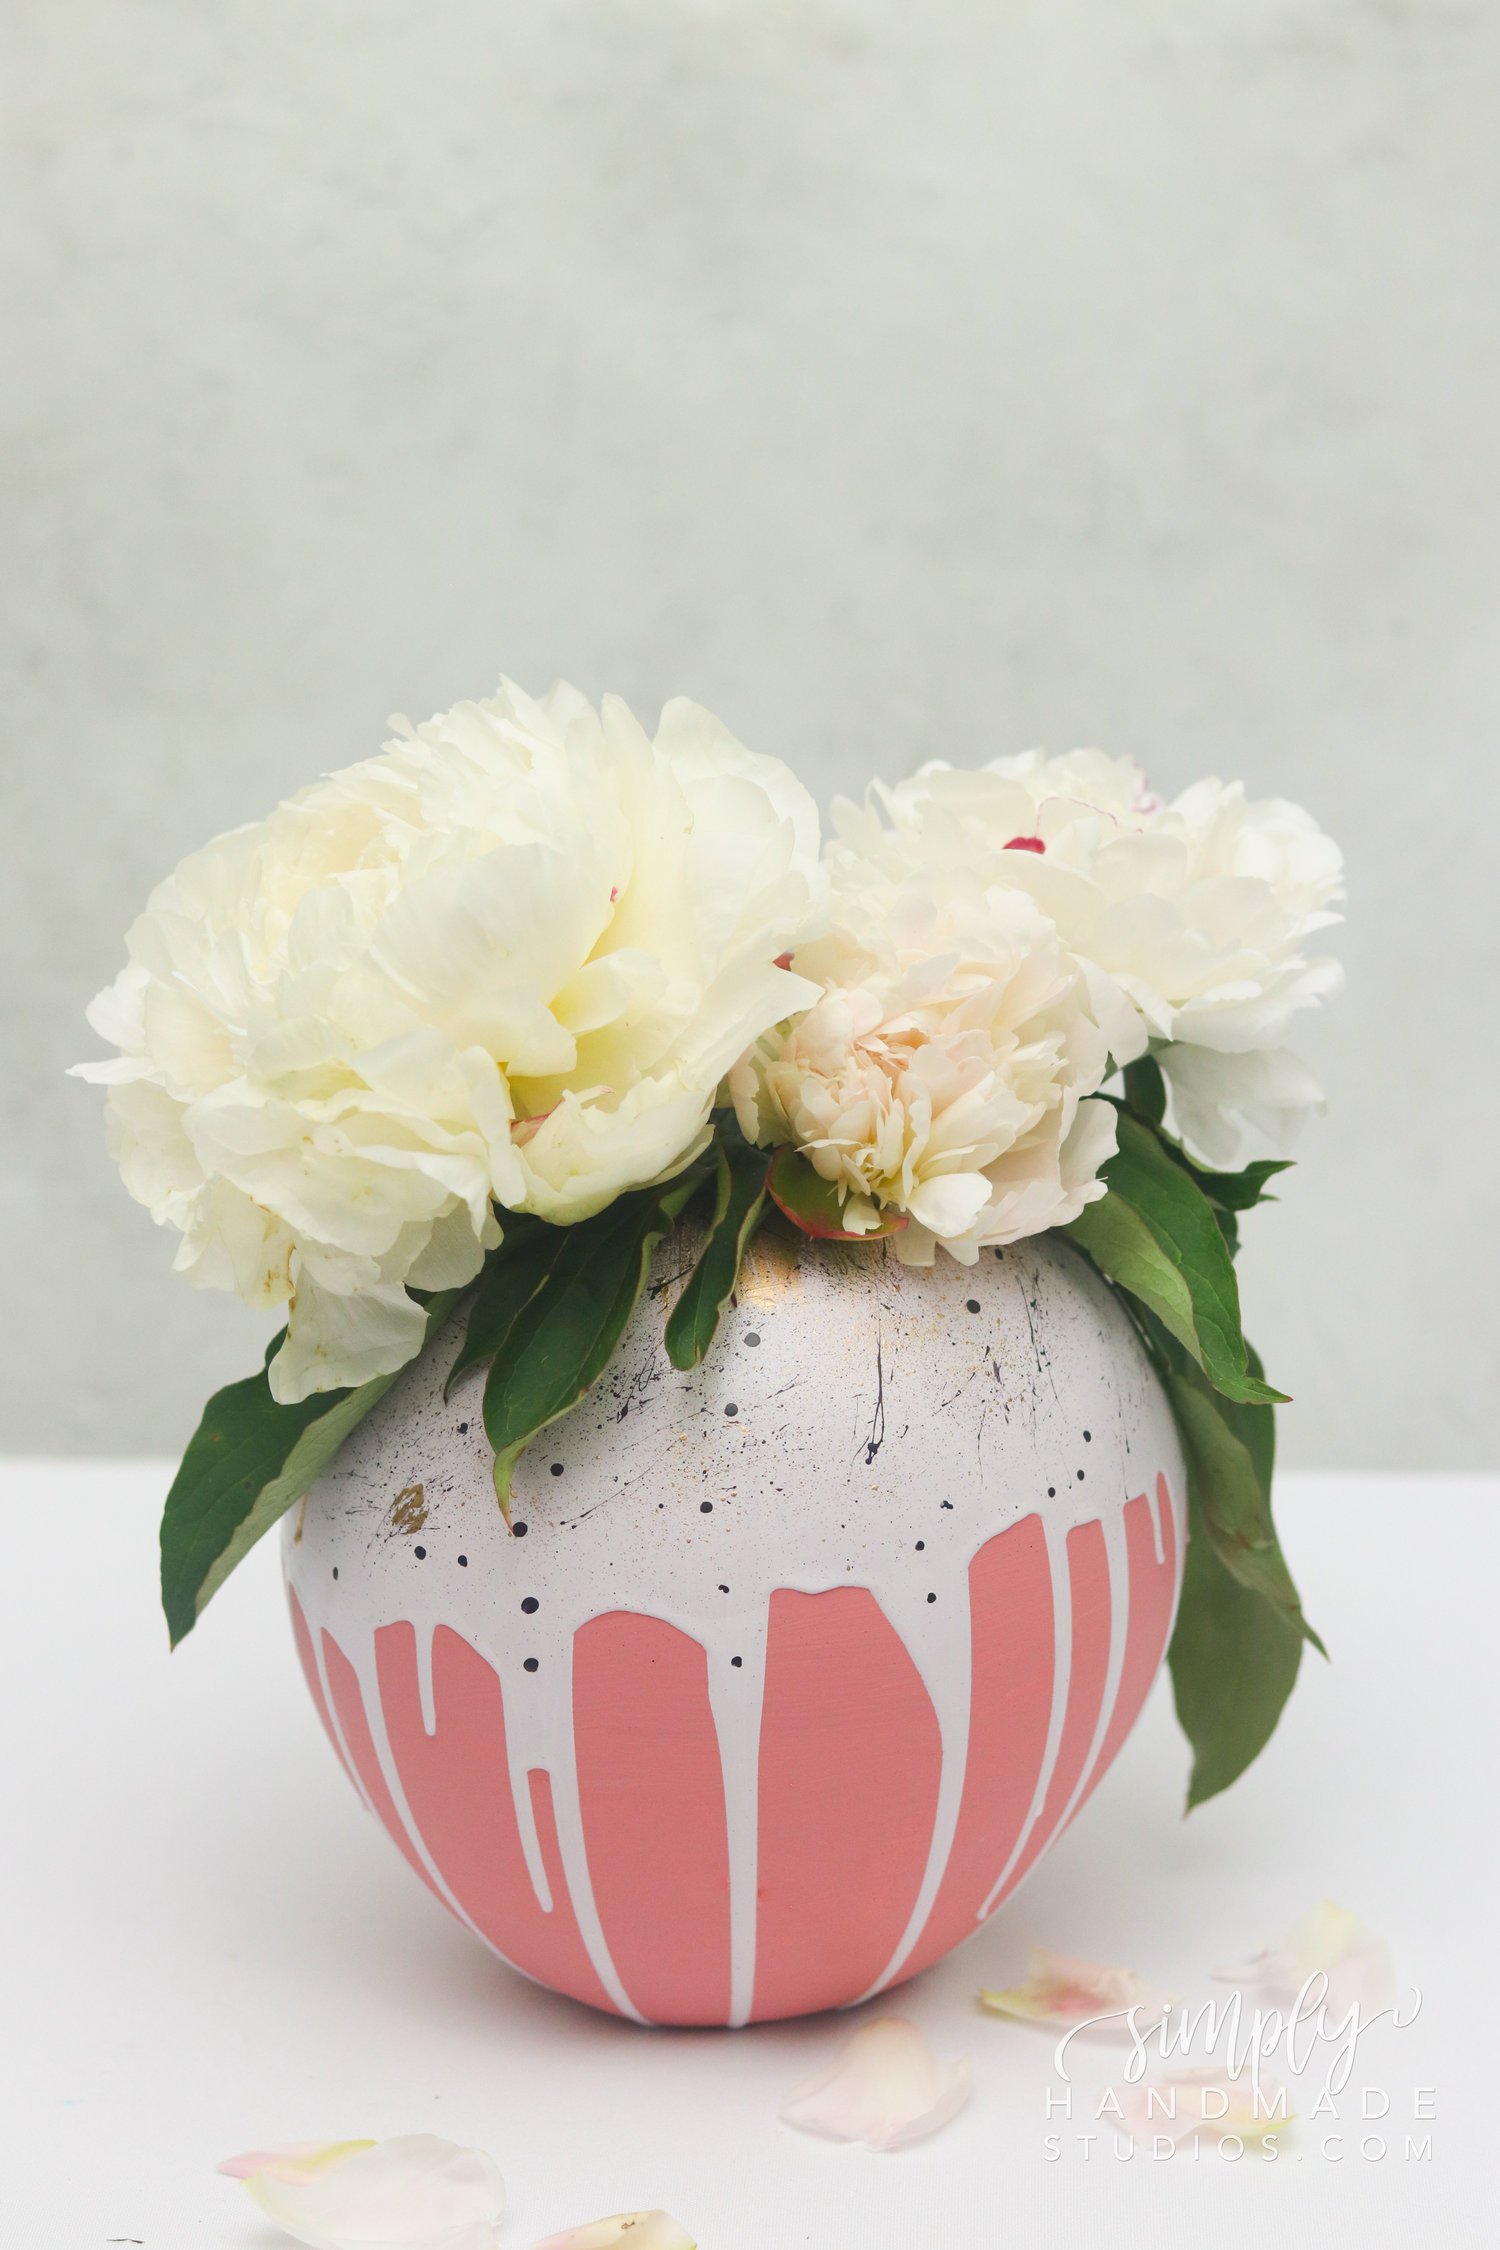
Once the sealer was dry, I mixed yellow, red, and a little white to make this pretty pink color and painted the outside of the vase about 3/4 of the way up.


I’m going to paint pour the second color on top of the vase so I wrapped a cup in cling wrap, placed it inside a container to protect my surface, placed the vase on top then started pouring the paint onto the vase.
Be patient with this step and let the paint drip naturally. After a few minutes, you’ll begin see where you need to fill in based on how the paint is falling.
The more paint you pour on top, the more the color underneath will be concealed so keep that in mind.
I coated the inside with a second layer of waterproof paint then moved onto the next step.

Once the paint and sealer has dried, I painted the paint our part of the vase with Liquitex so it can have a nice shiny texture against the matte under color.

I decorated the outside with gold by stippling it on the vase with a toothbrush and other paint brushes. This design process is totally up to you and how you want to decorate your vase so have fun!
Want to see how I made it? Check out this YouTube video:
Wondering if the vases are really waterproof?

Yes, they are! I tested these bad boys for a couple of weeks and there are absolutely NO leaks! I'm super excited about this since the other option was to coat the inside with resin which wasn't necessarily cost effective.
If I were to make these vases again, I would definitely do a few things differently:
I wouldn't use colored balloons! When I first started making these vases, I thought it sould be SOOO cute to use colored vases (pink, of course!) I was wrong. I couldn't tell if the plaster coated the entire balloon and it left me very frustrated when I popped the balloon to see a huge gaping hole in the plaster. Don't be like fist-time me, use transparent balloons!
I wish I read the directions on the plaster on how to actually make it. I wasted about a half dozen balloons just because I thought I could eyeball how much plaster & water I needed. I was wrong, again.
Patience is key for this project. One vase would take about 3 days in total to complete and I'm just not used to waiting that long to be honest.


I hope this post inspired you to use plaster in an unconventional way! Check out this post if you want more plaster projects!
