
Renter-Friendly Picture Frame Moulding
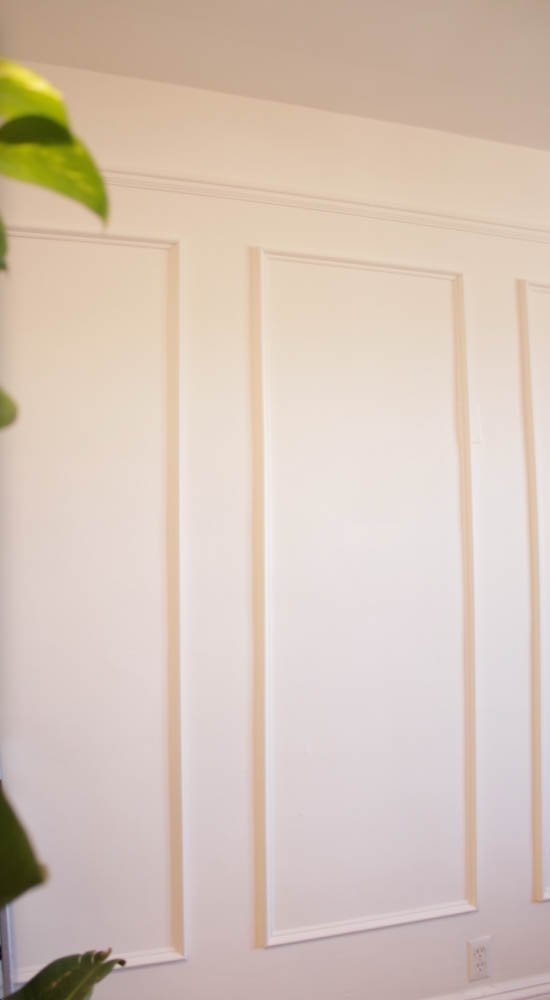
Picture frame moulding is one of those designs that I absolutely love and had recreate it in a renter friendly way. It’s actually not as bad, and I accidentally found less expensive materials at the hardware store to create this wall under $50.
Difficulty: Easy
Materials needed for this project:
PVC trim molding
Double sided mounting tape
Paint (the same color as walls)
Caulk (optional, and comes off easy for renters)
Painter’s Tape
Tools Needed for this project:
Miter saw or box saw
Tape measure
Level
I N S T R U C T I O N S:

The first thing I did was visualize the project with painter’s tape. I didn’t initially measure, I just wanted to see what configuration was best and go from there.

Once the painter’s tape was all done, I measured out the size of the frame and made the appropriate miter cuts (45-degree cuts) on my miter saw. For the frames I had, I measured 19”x 72”.
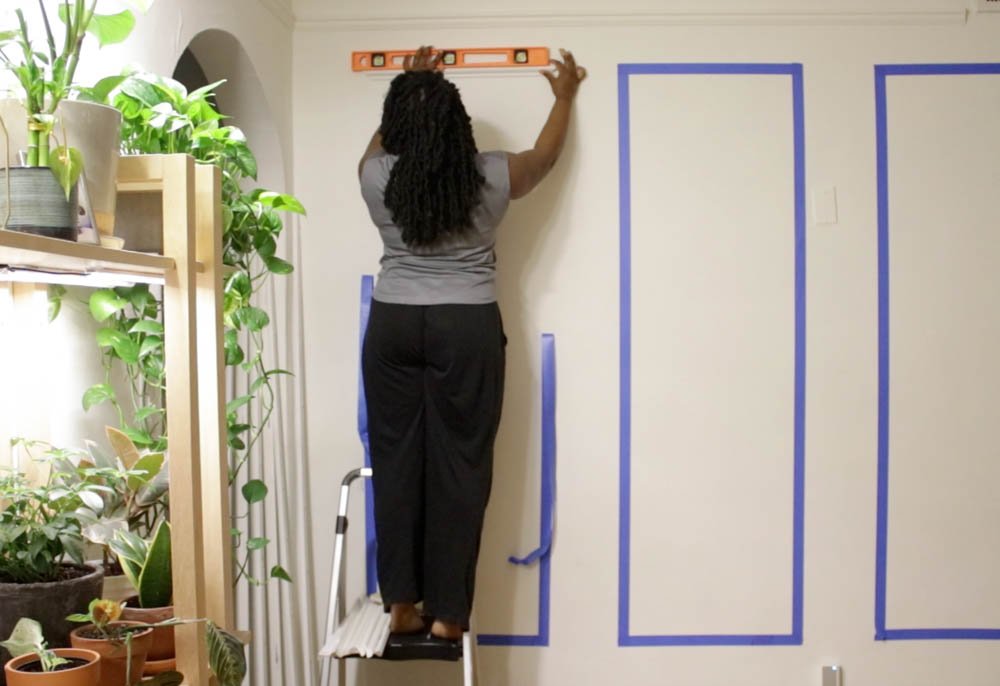
Once cut, I added double sided mounting tape to the back of the PVC moulding every couple of inches (about every 4-5 inches) and added it to the wall. It’s important to make sure the moulding is level so it’s square on the corners.
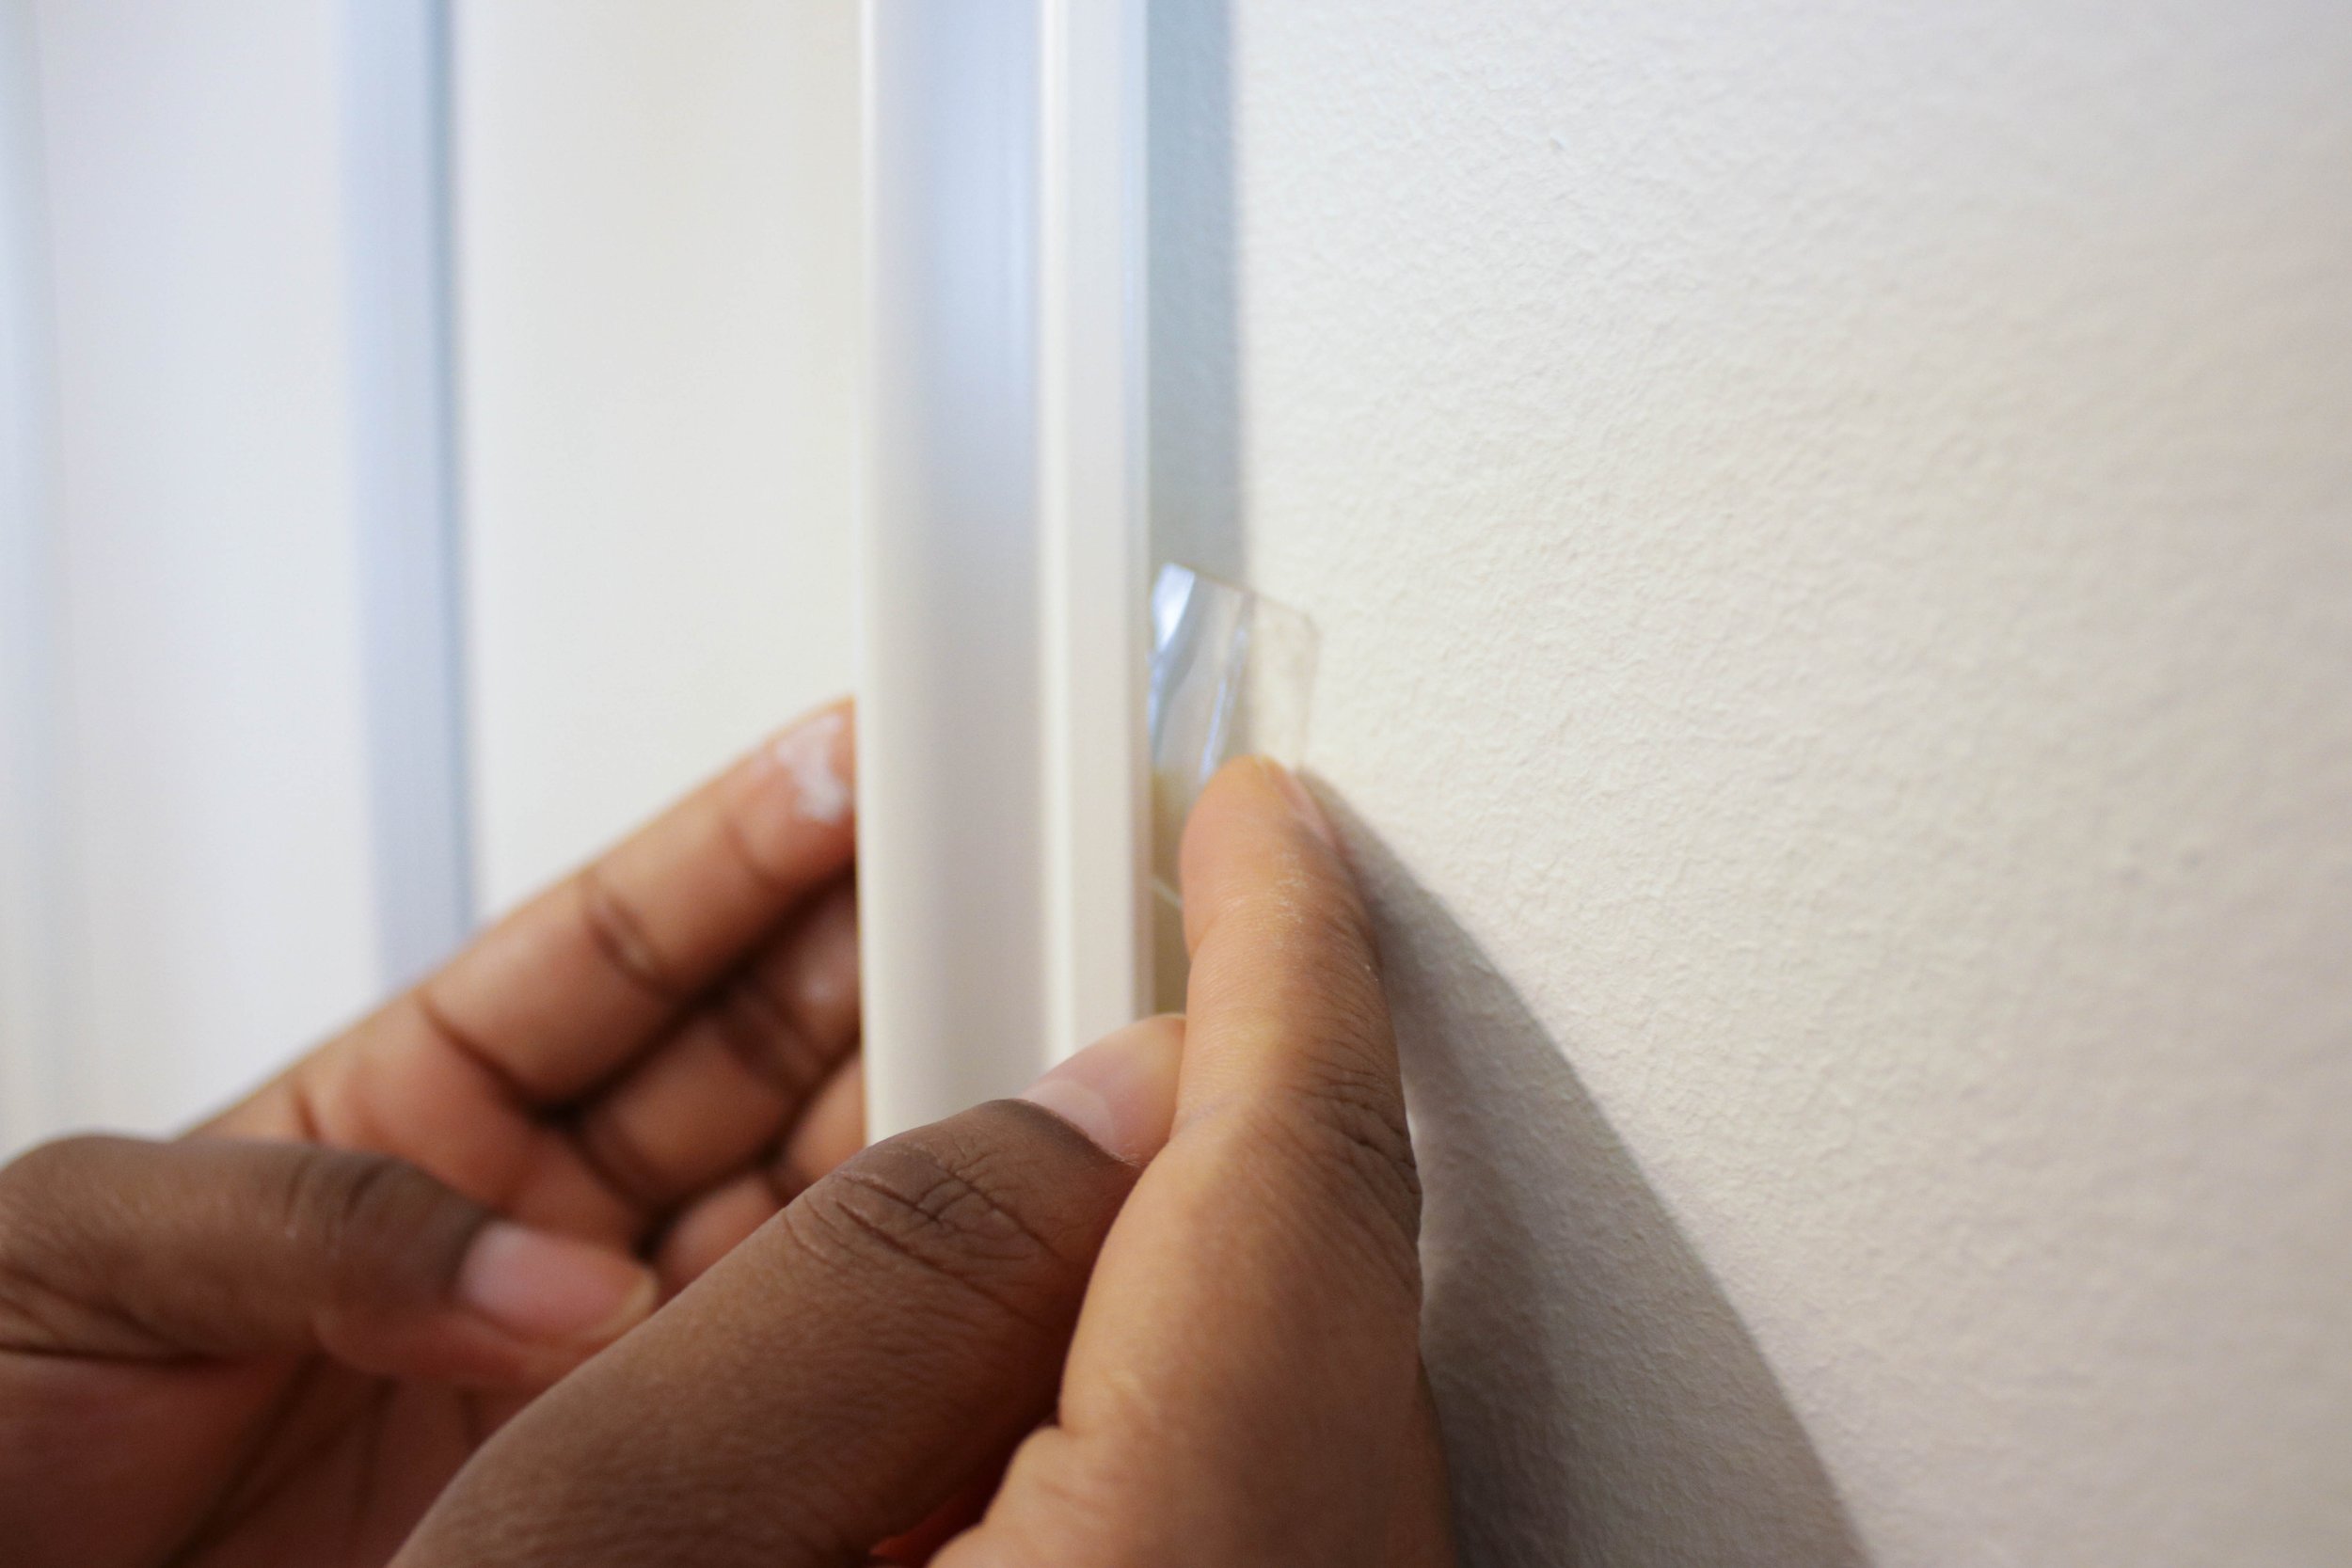
There were some “loose” PVC moulding on the walls since I live in an old house (and therefore the walls aren’t even or straight), so I cut some extra double sided tape and shimmied it behind the moulding and pressed it into the wall.

I was hoping not to caulk, but there were some obvious seams that I could not ignore and saw every time I walked into the room, so I ended up caulking and painting the moulding the same colors as the wall.
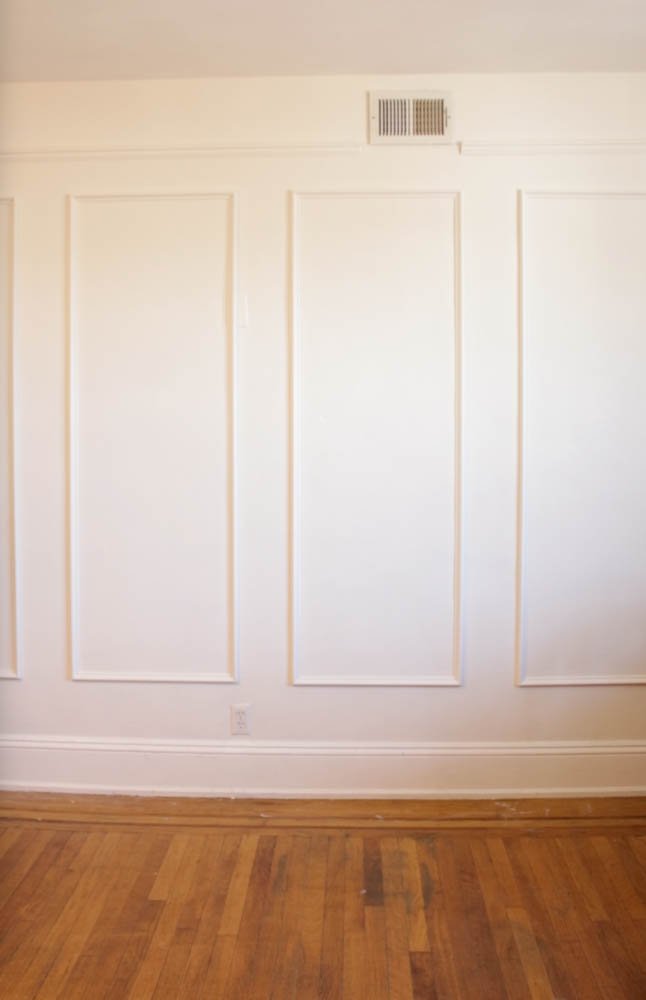
This DIY was incredibly easy and I did this in about a day (while wrangling 4 little kids!). I hope you enjoy and know you can have a gorgeous space as well whether you rent or own.