
DIY Wedding Centerpiece on a Budget (Part 2)
After I did the gorgeous bottle centerpieces I wanted to find another equally as gorgeous, and equally as cost effective centerpiece. I was inspired while making a can of beans for dinner. It clicked - why not use tin cans?! so I did! Like the bottles, these can be collected over time at various sizes which means they were practically free! All you need to do is spend a few bucks on lace, flowers, candles and you're pretty much on your way to making this beauty!
Of course as a YouTuber, I have a video to accompany this post! Watch it, read the post and create! simple, right? :)

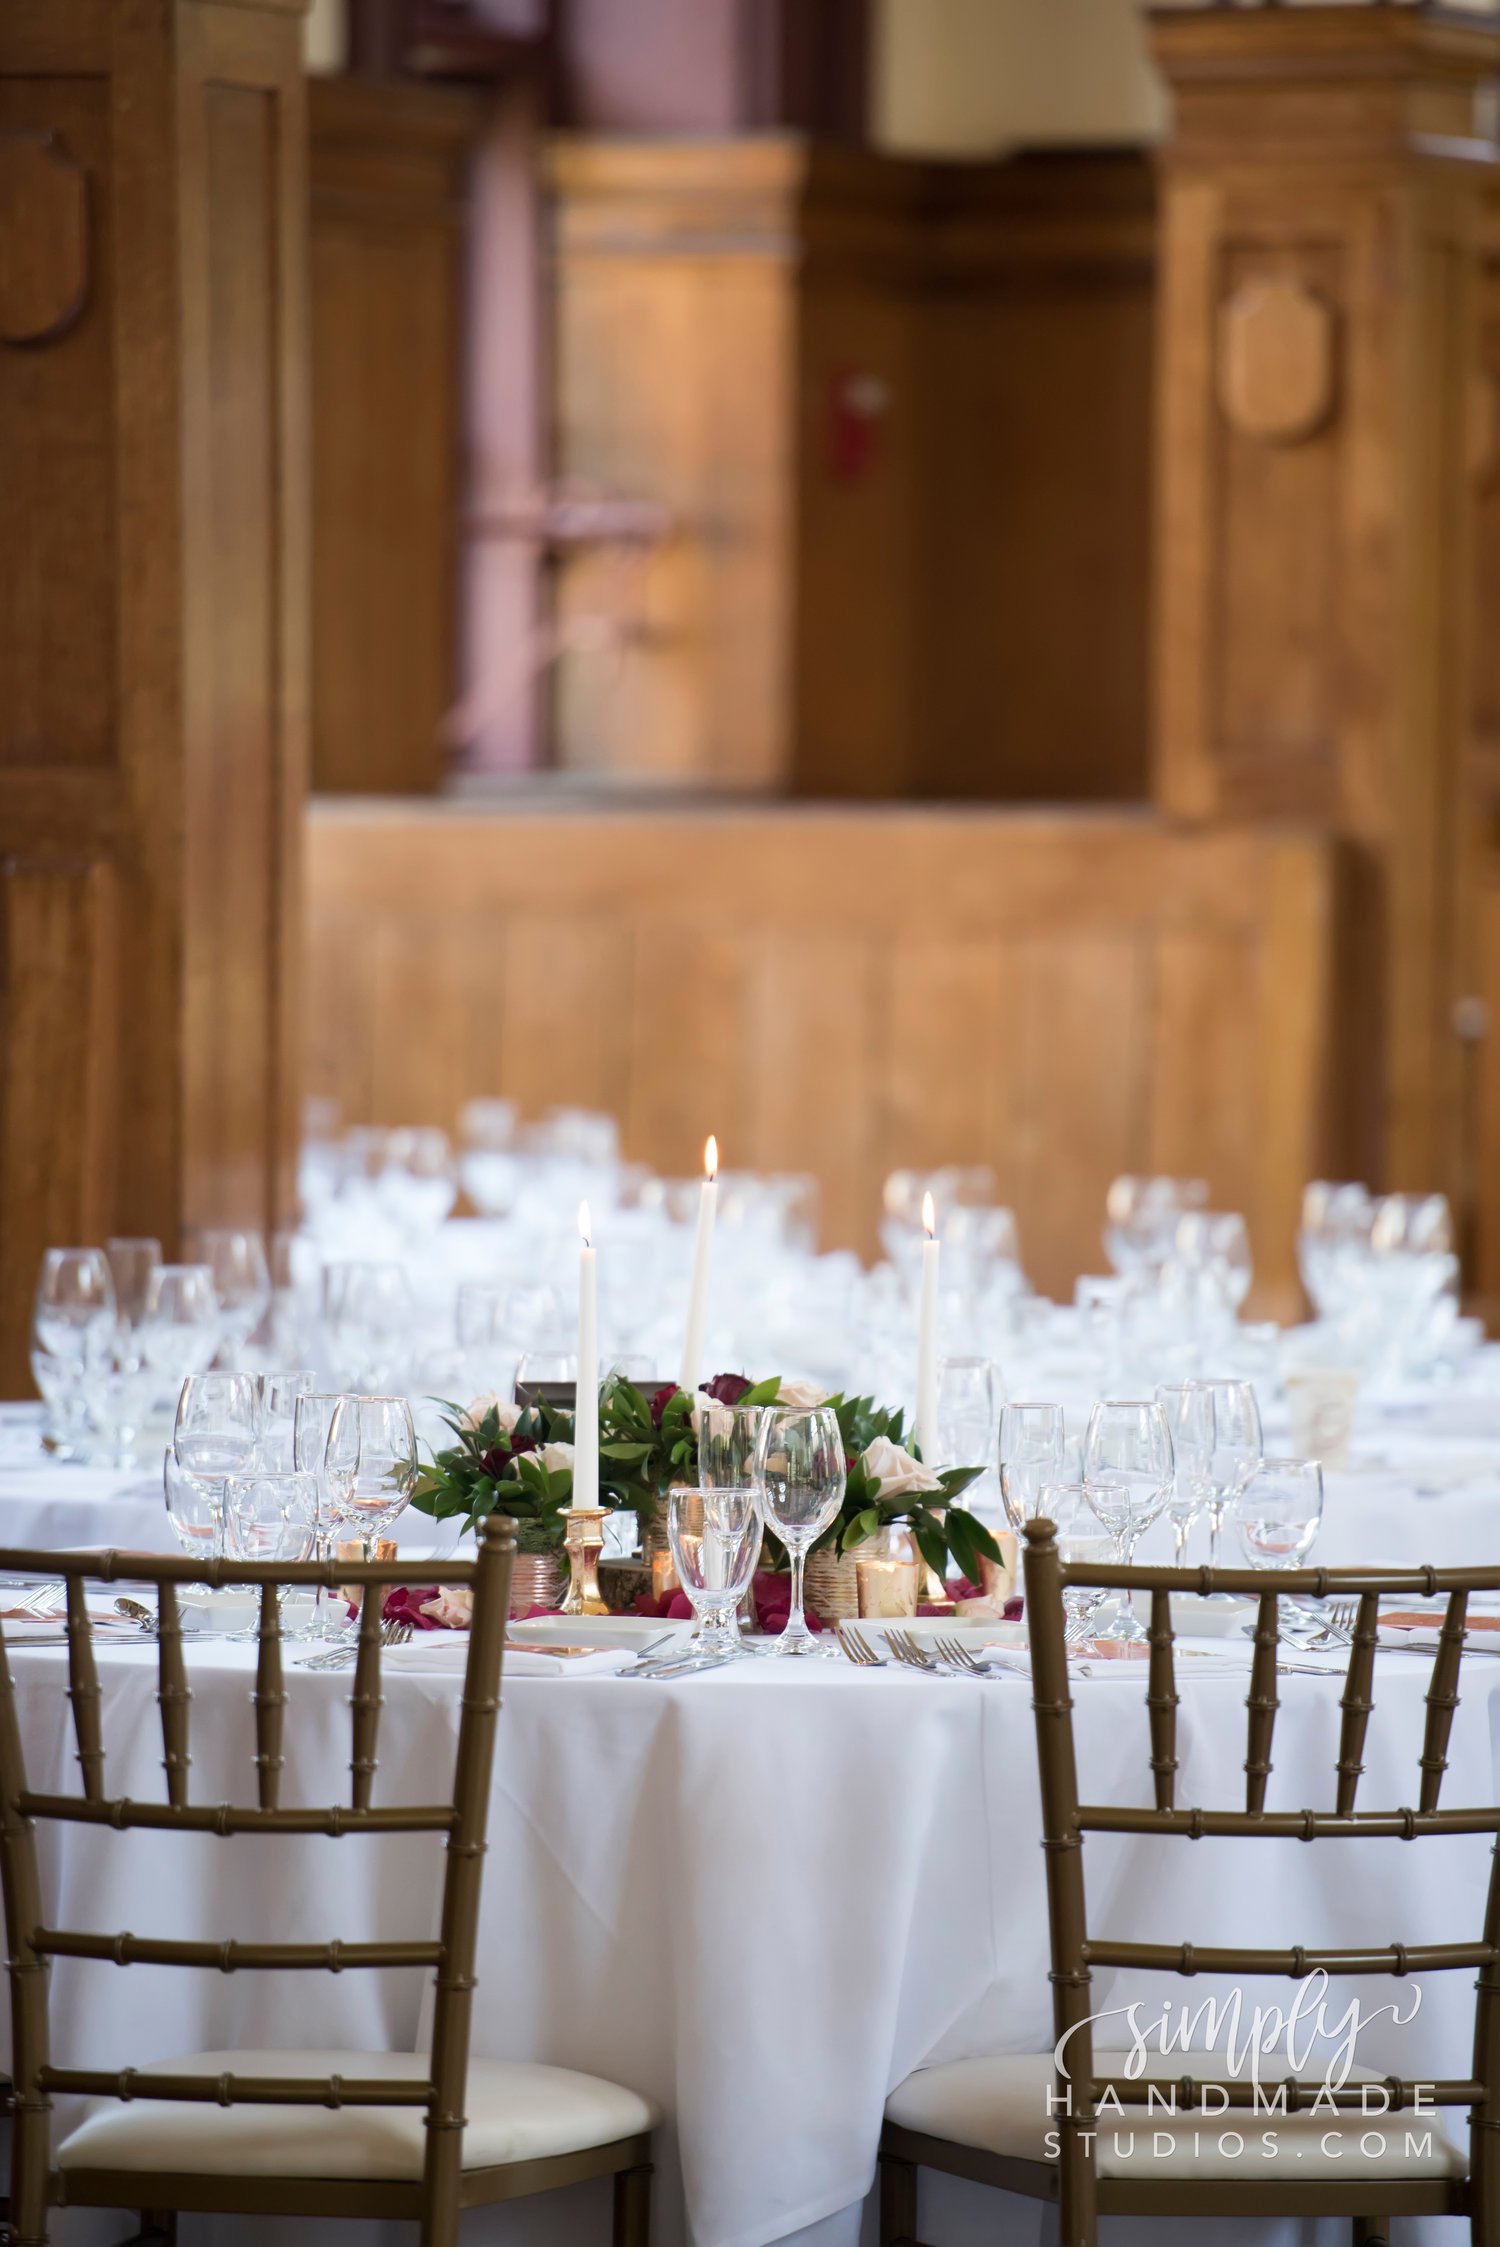
Photo Credit: Studio A Images (@StudioAImages) / Flowers from Flower Moxie (@flowermoxie)
Difficulty: Easy
Cost: $$
Materials Needed for this project:
Tin Cans: Those cans in your pantry will be perfect here! If they're various sizes, that's a plus, too!!
Spray Paint (Copper, and Gold if you're using this same color scheme as me)
Floral foam for fresh flowers. If you're using faux flowers, there's special floral foam for those so read the label carefully!
Bucket of water
WD40
Flowers and Water: Duh. I got mine from flowermoxie, but you can get it from your local florist or nursery. Whatever is the most cost effective for you! If you're determined to go with faux flowers.. they will also look beautiful here but don't go with the cheap stuff (or it will look cheap overall). Mix and match between really nice flowers (from your local craft store coupled with a coupon) and less expensive flowers from the dollar store.
Flower Petals: I used these faux but you can opt to use real flower petals.
Tools Needed for this Project:
Gardening Shears to cut the stems of the flowers
Hot Glue Gun
Hot Glue Sticks
Long Knife
Rag or paper towel
Instructions:
To begin, grab some tin cans and remove the paper. I still had some sticky residue so I took WD40 and cleaned it the same way I did the bottle centerpiece DIY.

Once the residue is gone, I washed all the cans and let them dry overnight.
The next day, I spray painted the cans outside. Like the bottle DIY, I spray painted some gold and some copper (no need to add primer before spray painting).

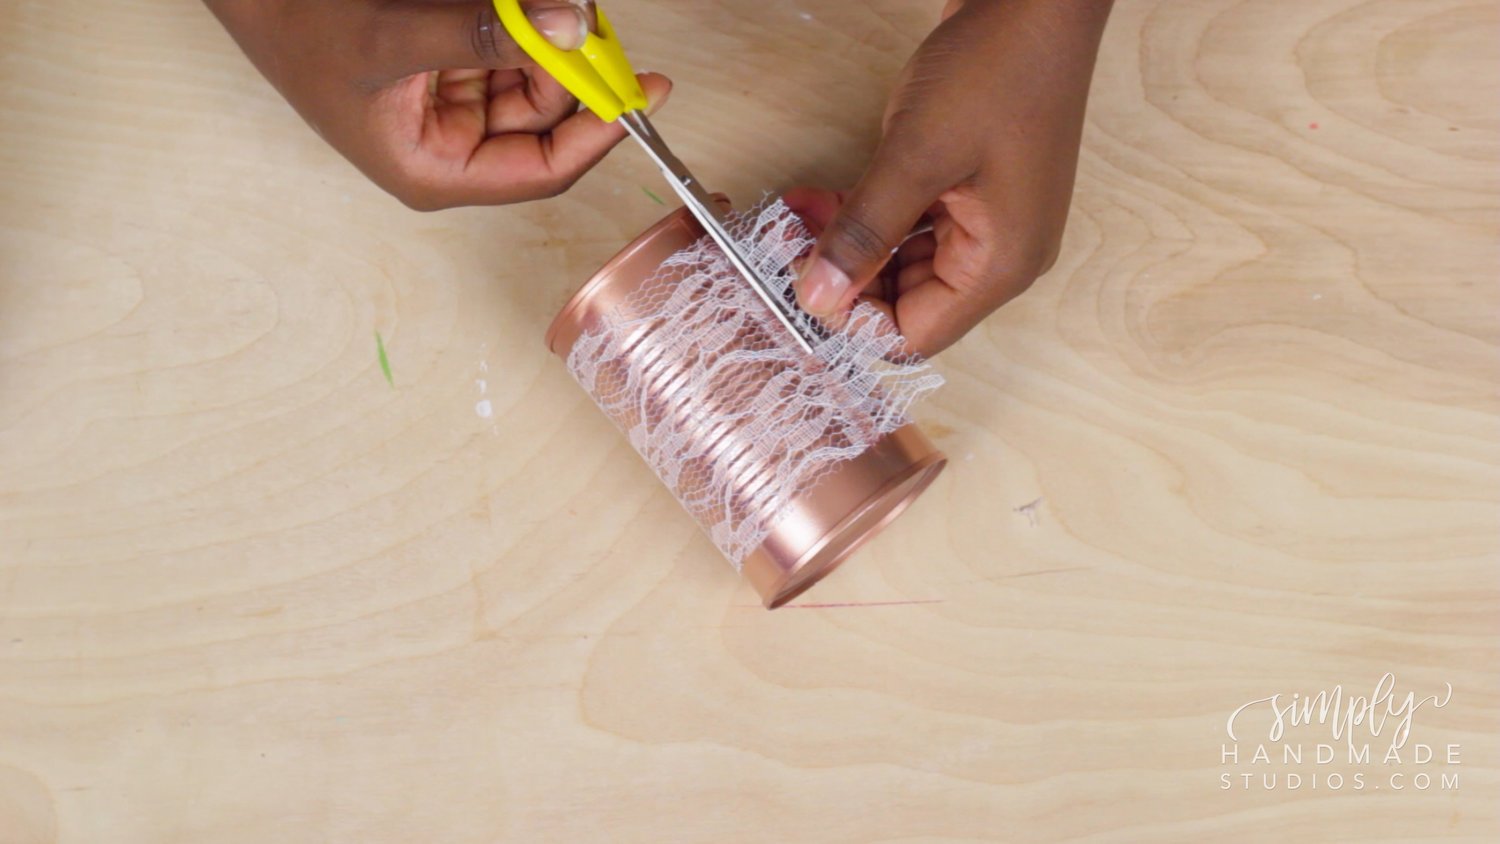
After the cans had time to dry, I grabbed this lace and measured how much coverage I wanted around the can. I cut it down a bit then cut off enough to go around the can. I folded the lace in half then continued to cut both sides of the lace to make sure I have a straight line.


I wrapped the lace around to make sure I have the right amount of coverage for my taste then glued the lace onto the can. I added some more glue on top to make sure it holds then cut off the excess.
For some of the cans I decided to add moss around by adding a design with hot glue and patting in some moss. Let it set for a few seconds then cut off the excess.


Next up, I grabbed this foam specific for fresh flowers. If you're using faux flowers, be sure to get foam specially made for faux flowers.

I took out one block of foam and made an impression of the can on top to determine how small I need to cut down the block. Next up, I used a regular 'ol kitchen knife and cut away the excess. The foam is super easy to work with so you don't need anything fancy to cut it with.


When you have the foam cut down to the size you want (and it fits in the tin can), place it in a bucket of water and let it sink to the bottom. It's pretty tempting to want to push the foam into the water but just let it sink on it's own!
While the foam is submerging, this would be a good time to trim down the greens and flowers you'll be using. Cut them down at a 45 degree angle so it's easy to jab into the foam.
When the foam brick fully submerged, take it out and place it in the tin can.

I then took some of the greens and placed it into the floral foam until it was pretty much covered. You'll want to avoid seeing the green foam underneath as much as possible.


When you're happy with your greens, add the largest flower on top. You'll want to commit to the hole you first place the flower in so it can drink. If you re-use a hole it already has an air pocket which won't allow the flower to drink, which will cause the flower to droop during the reception. Don't have droopy flowers!! Just trust me and don't re-use holes.

Once you add the larger flowers, put as many smaller (or larger) flowers around it and BOOM! You're all done. Now to do a couple dozen more! Once you get the hang of it, you'll be surprised how fast you can do this. I whipped up this bad boy in less than 5 minutes, and it was my first time doing something like this (plus I was filming)!

Now all you have to do is set the table, add some candles, faux petals, a table number and menus!


Now you know you don't have to break the bank to have a gorgeous wedding!! I wish I was this creative when I was walking down the aisle! Don't forget to check out the YouTube video by clicking here if you haven't already.
If you have any questions about this post (or any of my other DIYs), go ahead and leave a comment below! Let me know what you think!