
DIY Drywall Repair
DIY Drywall Repair
During my DIY Small Closet Makeover, I realize the actual layout of the closet is just horrible. I wasn’t using the space to it’s maximum potential, and having 4 kids in a NYC apartment, I needed to be able to store things efficiently, and let’s face it - I also want it to look nice. Before I could design the closet, I had to demo it, which I will show you in this post. Demoing left a bunch of holes for me to patch up, and being that it was my first time doing this, I chose to document the process.
Materials needed for this project:
Paint
Bucket with warm water
Dark colored cloth
Dust Mask
Tools needed for this project:
Paint Brush/Roller
Wood Shim or durable putty knife
disclaimer: links in this post may be affiliate. Please review the disclosure policy for more information.
INSTRUCTIONS:

Step 1: Demo the area
I began by demoing the area that I wanted to reconfigure. There was some shelving I needed to remove along with the corresponding supports.

Step 2: Patch the holes
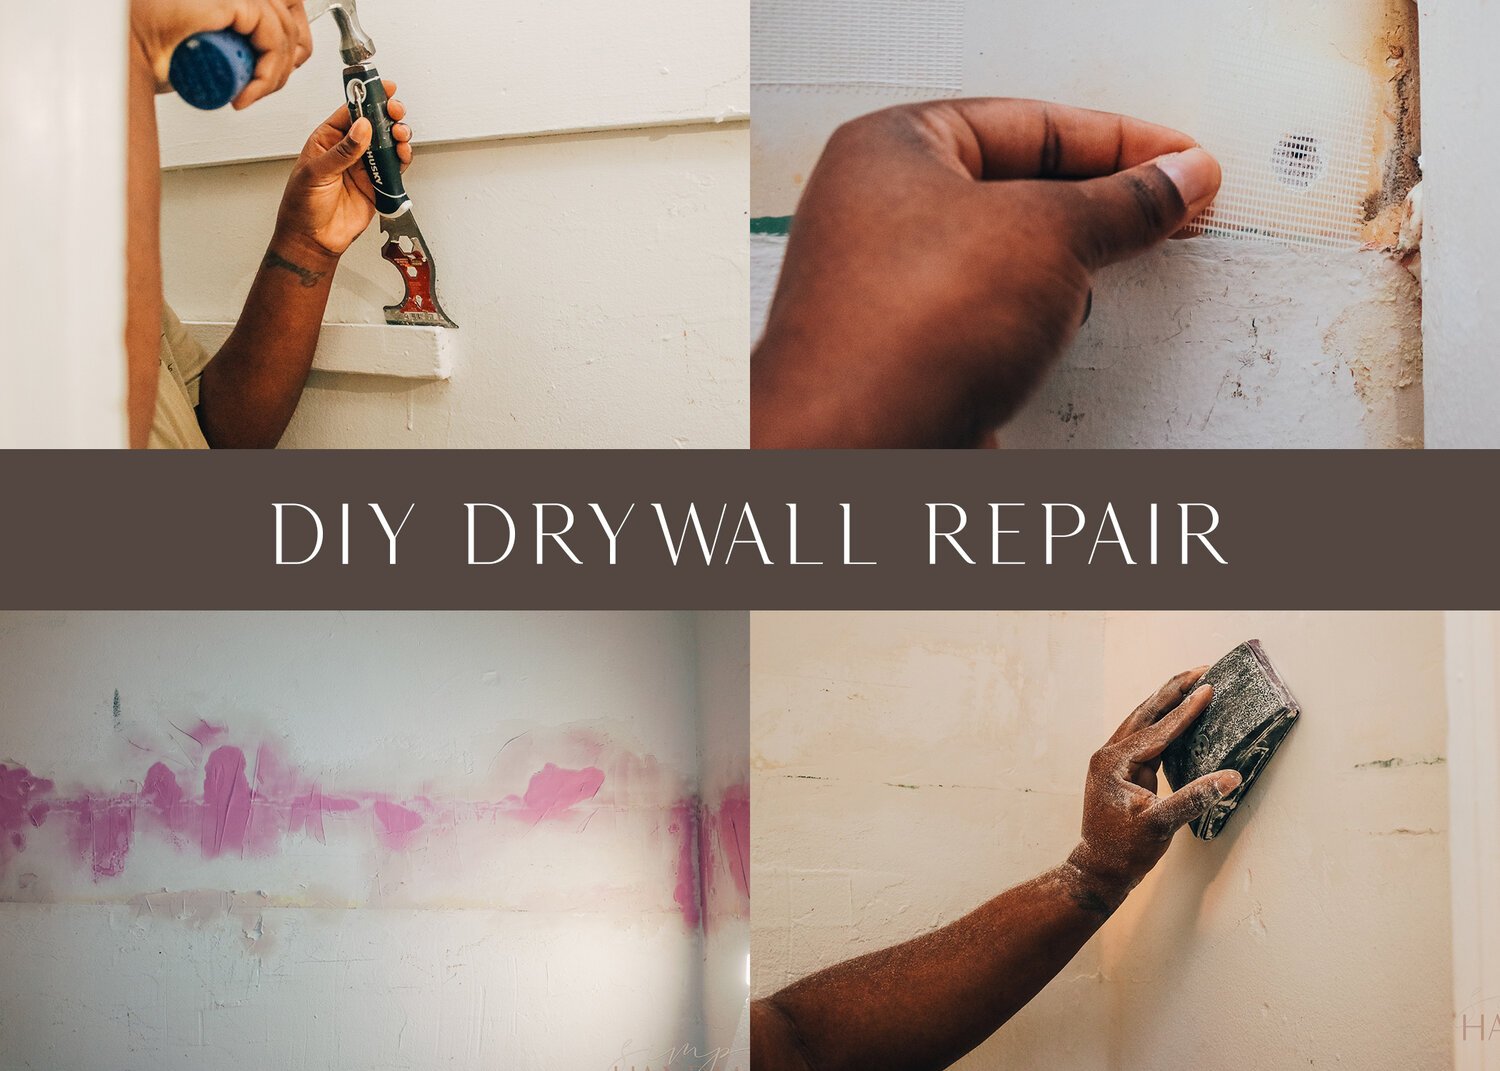
After removing all of the wood out of the closet, I had quite a few holes I had to deal with. Some were small nail holes, which was really easy to patch, but others were bigger, but not quite big to completely remove the drywall. I started to repair the holes by removing all the debris from the hole. I didn’t want anything obstructing the spackle, or anything that would disrupt the hole. Next, I wiped away any excess dust with a paper towel, then cut some fabric mesh approximately 1-inch larger than the hole on all sides and stuck it right over the hole.

The next part of this step is to use the putty knife and add spackling to the hole and feather out the edges. By feathering, I mean to gradually add less spackling toward the edge of the holes, fading it out so the seam between the hole and the wall is virtually invisible. I really like this spackling because it goes on pink, and once dry, it turns white.

Step 3: Sand the Spackling
There will inevitably be some bumps after you spackle a hole (especially for the first time), so I used a 220 grit sandpaper, and sanded where I put the spackling in order to blend in with the wall as seamless as possible. Please note: I wore a mask while sanding. There is a lot of fine dust formed when sanding the walls. I didn’t want to breathe in the harmful dust.

Step 4: Remove the dust from the walls
After some research, I found a few ways to dust off the walls . . . one way included actually sweeping the walls with a broom, but I didn’t want to kick up a lot of dust back into the small closet, so I opted to use some water and a cloth instead. I used a damp dark-colored cloth to wipe down the walls and rinsed off the cloth in between swipes. the dark color allowed me to see if I should continue with more passes (it will be heavily soiled) or if I could stop (virtually no more dust on the cloth).

Once I allowed the walls to dry, I notice there was still some dust particles on the wall. This is when I decided to dust the walls with my duster, and it removed the remaining dust and allowed me to move to the next step.

Step 5: Prime and paint the walls.
Before moving onto painting the walls, we first have to prime the walls. Follow the instructions on the can and then paint to your heart’s content.