
3 EASY Easter Egg Decorating Ideas

Easter is one of the biggest holidays for me.. although my family and I don't celebrate with an elaborate dinner, we do reflect on the resurrection of Christ - which is what makes Easter so important to us! I have been torn for a little on whether I wanted to do an Easter Egg DIY but since having kids, I wanted to do some traditions with them so I figured I could do Easter Eggs while keeping the true meaning of Easter alive.
This will be a two step process (blowing out the eggs + decorating them) but first, let's go over the materials we'll need for the DIY!
Materials Needed:
Eggs (regular grocery store eggs will work! Nothin' special here)
Empty bowl (preferably with a lid to store eggs once you're done)
Bowl with water or your kitchen sink
Paint (assorted/your choice)
Paint Brush(es)
Instructions:
Step 1: Blow out the Egg
P.S. you can totally purchase blown eggs online or at your local craft store if you want to skip this step.

To blow out the egg, make a hole on either side of the egg with the pin and wiggle it around to make the hole bigger.
After I made the holes, I inserted the pin and tried to poke a hole into the egg yolk to essentially scramble the egg contents while it's still inside the shell by shaking the egg!


I realize that the egg is ready to be blown out when it sounds like water is inside of the shell. Just don't get the yolk all over you like I did while listening for the water sound LOL!!

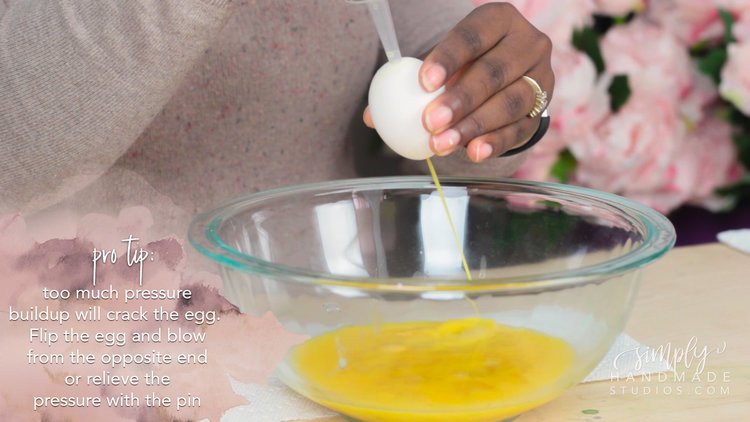
Take the syringe and place it on top of the hole and gently squeeze air into the egg. The pressure should push the contents out of the opposite hole.
Pro Tip: If the egg yolk is coming up from the top or if nothing is coming out it means too much pressure is building in the egg. If it's not relieved, the egg shell will crack. To relieve pressure try shaking the egg or breaking up the inside with your pin.
Keep adding air from the syringe in the egg until everything is out.
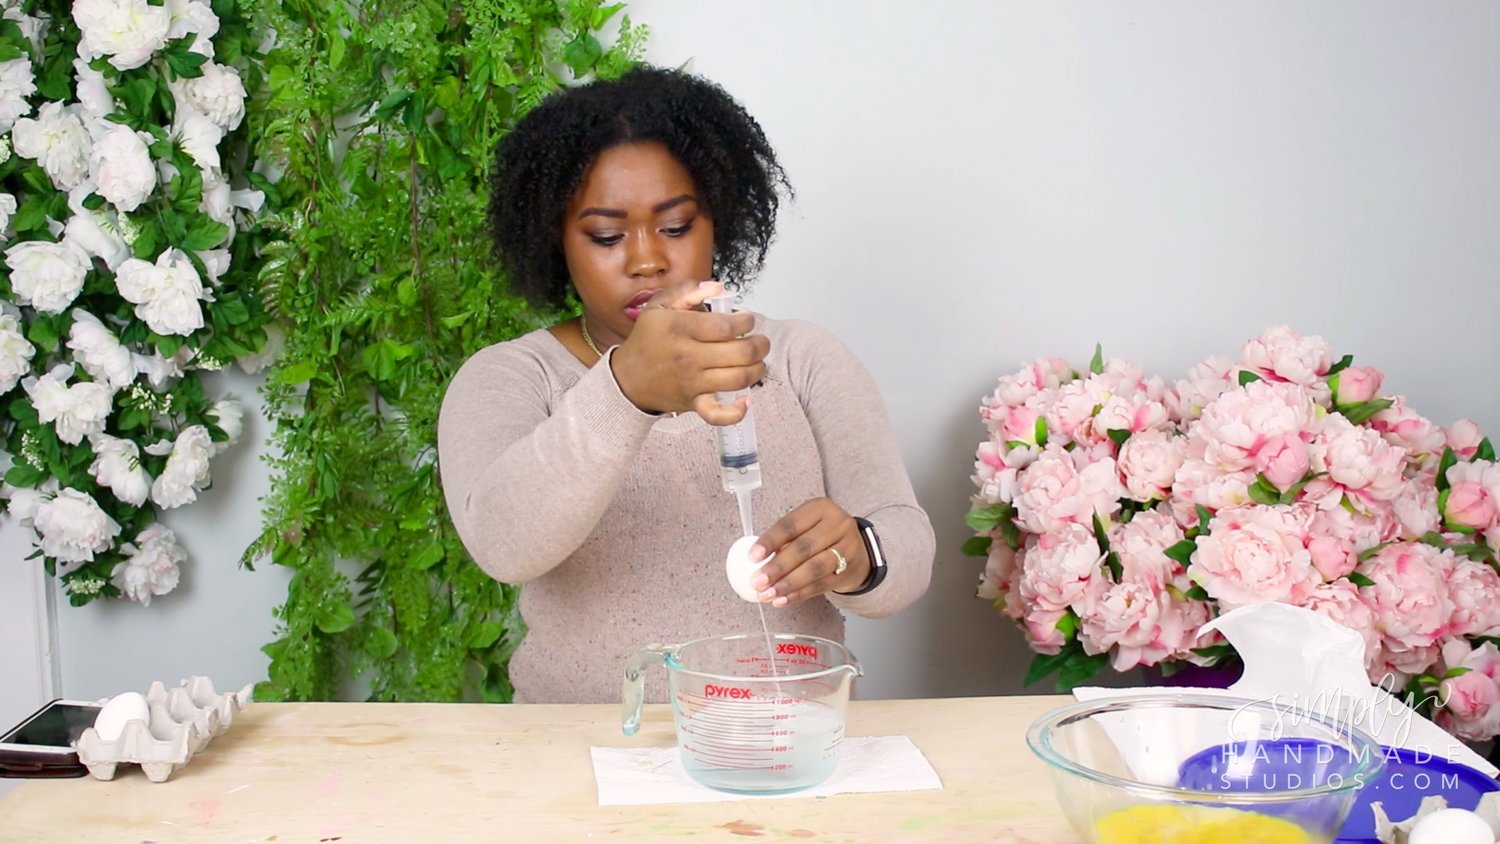
Once the whites and yolks are out, rinse the inside by adding some water into the syringe and push it in the egg. Some water will stay in the egg while some spews out. To remove the water in the egg, just add air into the egg with the syringe (just like taking out the yolks!) and you're done!
I'd recommend grabbing at least a half dozen extra eggs to practice since it takes a bit getting used to :)
Now let's do step 2 which we'll break down by each design.

First up is this golden egg!

This golden egg is seriously the easiest one of them all. Just grab some gilding paint and a brush you don't care about messing up and just paint! This gilding paint is super opaque so all I needed was just 1 layer.
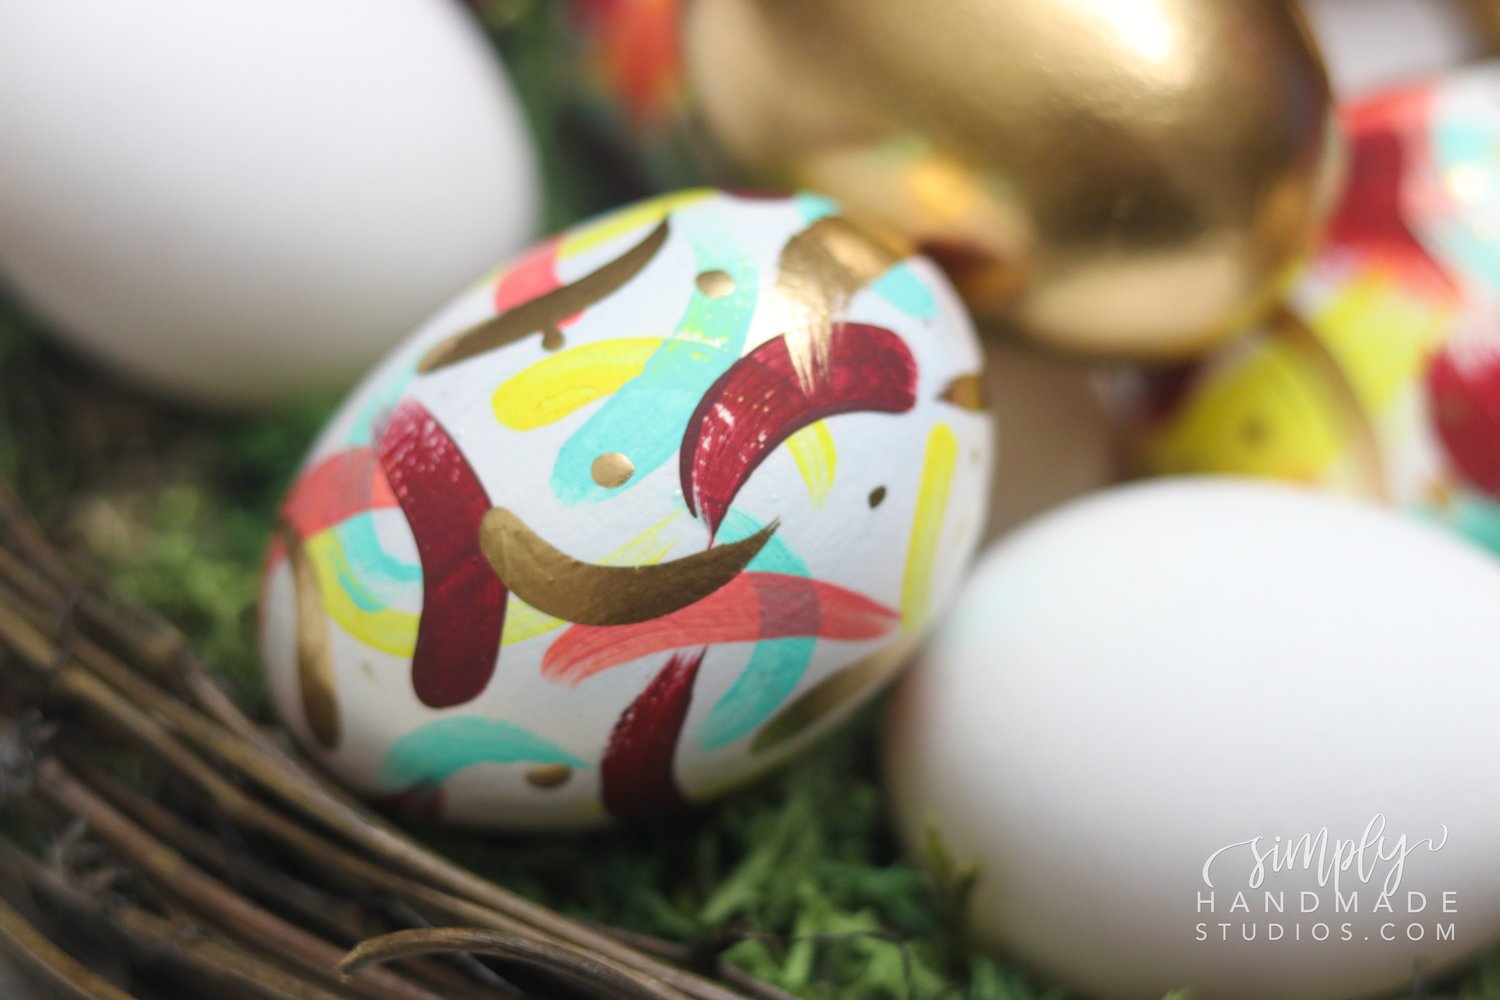
Second is this abstract egg!

This abstract painted egg is pretty easy and requires zero art skills! Fist, I painted the egg with this pearl paint I got from Michael's. To be honest, you could probably skip this step since we're going to be doing a lot design wise with this egg.
Once you paint the egg with the pearl paint, choose what colors you want on your egg and start with the lightest to darkest.


Paint with C-like strokes on the egg in no particular placement - it's just random, really! I used yellow, blue, coral, red (a custom color I'll tell you about in the last egg), and gold gilding paints. I also added some gold polka dots to finish the design and sealed it with a clear varnish.

Next up is this Easter Egg DIY!


I painted the egg with a custom color I made mixing some pink, red, and brown chalk paint. I chose chalk paint because I wanted a nice matte finish.
Pro Tip: Seal the chalk paint with varnish BEFORE designing with gilding paint. The varnish discolors the gilding paint which I had to figure out the hard way!
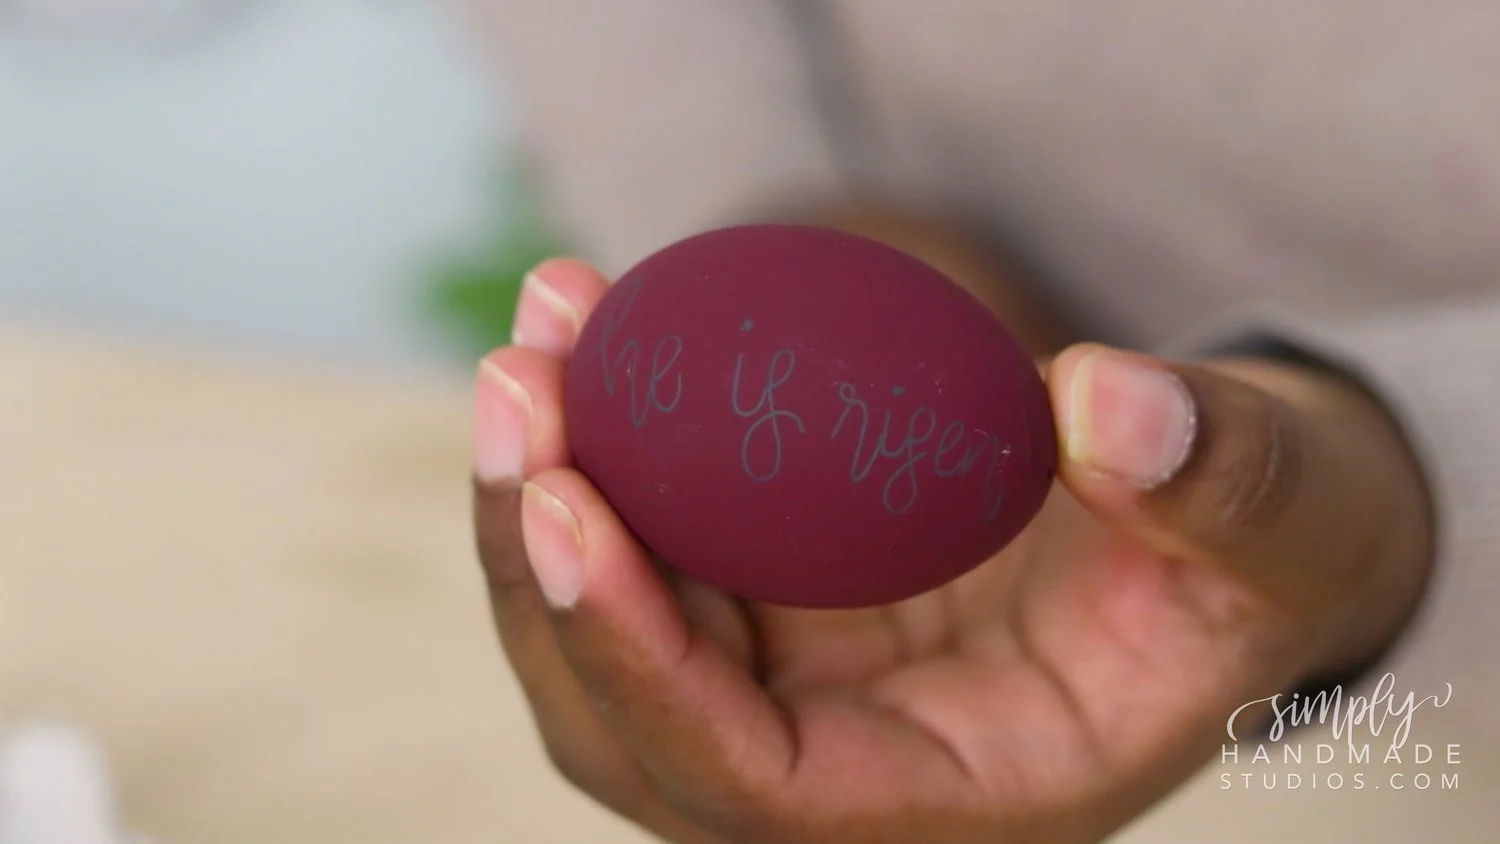
Once you paint the egg and allow it to dry, draw on a quote or what I have here onto the egg. Be light handed with this since we'll be tracing and we won't want the pencil marks showing through :)
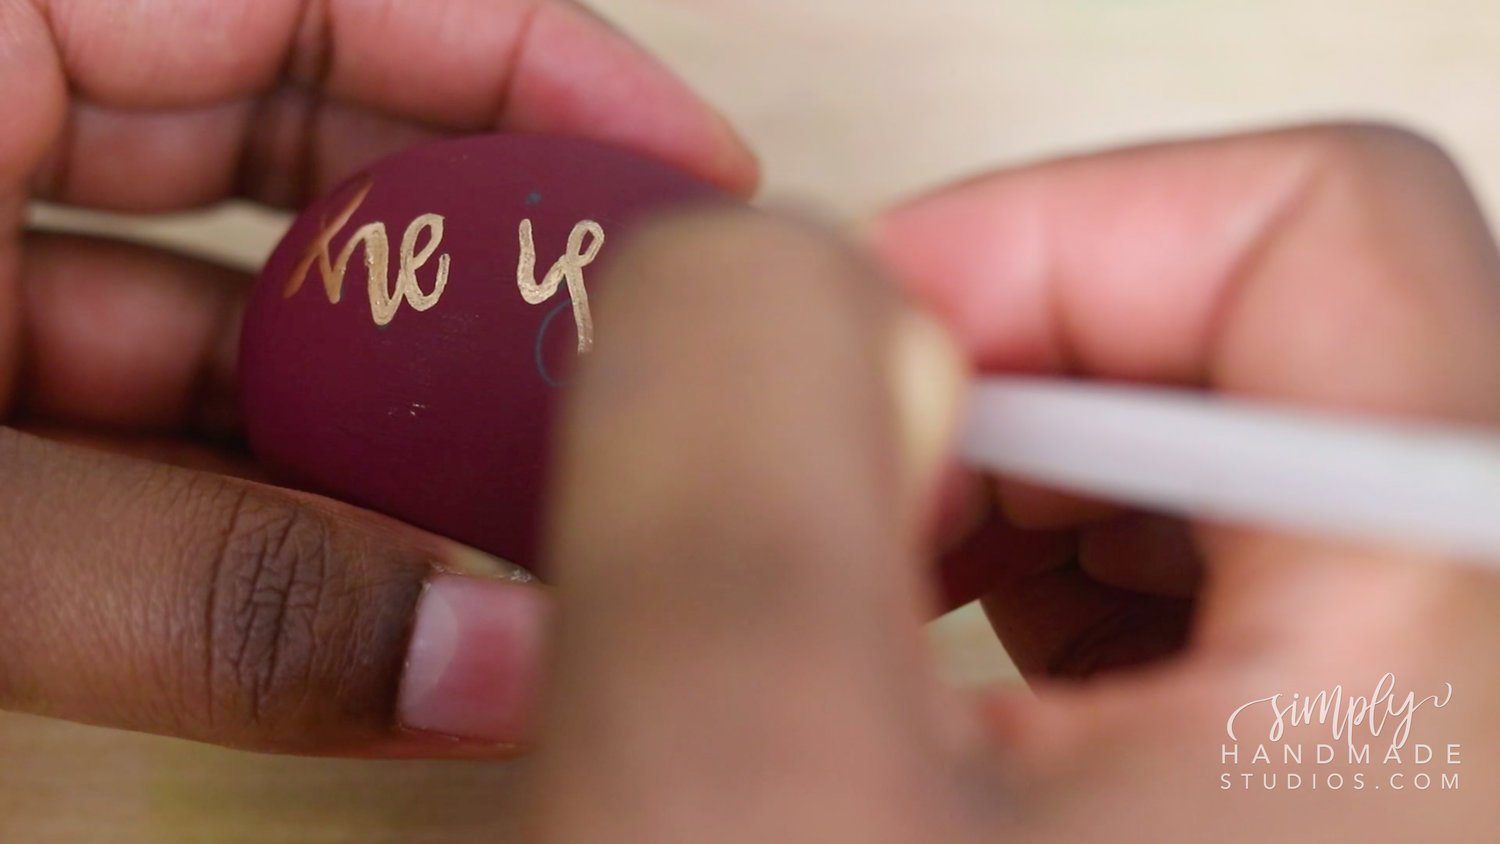
Go ahead and trace with a thin brush (or paint pen) and design to your heart's content! and Voila!

3 beautiful Easter Egg designs you can do with your family! Don't forget to check out the actual video of me doing this if you're interested!
I hope you liked this tutorial! Be sure to subscribe to my email list if you want to be reminded of whenever I post (I promise no spam!) and share this post on social media if you like what you read. Let me know in the comments which is your favorite and what your Easter traditions are. I'd love to hear from you :)